Imagine walking into a bedroom that instantly sparks joy and creativity—that’s the magic of a thoughtfully designed girl’s space! Girl bedroom ideas are incredibly popular because they blend personality, fun, and functionality, allowing young girls to express their unique style and interests. From whimsical themes to chic decor, these ideas transform ordinary rooms into inspiring retreats where dreams can flourish.
In this article, you’ll discover a delightful mix of decorating tips, themed setups, color schemes, and DIY projects that cater to every personality and taste. Whether you’re looking for playful, elegant, cozy, or adventurous ideas, there’s something here to ignite your imagination. Get ready to turn any girl’s bedroom into a vibrant, personalized haven she’ll love to call her own!
1. Upcycled Furniture with Colorful Chalk Paint
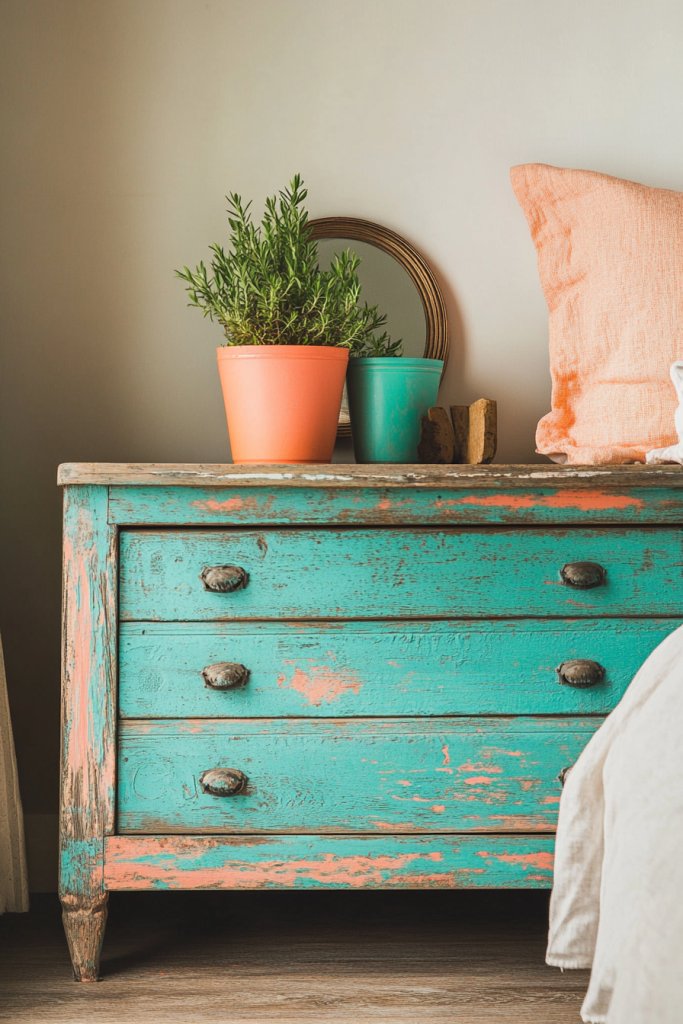
Tired of generic furniture that feels uninspired? Upcycling old pieces with vibrant chalk paint breathes new life into tired furniture and adds a pop of color to any space. It’s an affordable way to customize your room and make every item uniquely yours. Plus, it’s surprisingly simple to do, even if you’re a novice.
Picture a vintage dresser painted in a lively mint or blush pink, with distressed edges for a shabby-chic look. Or a tired side table transformed into a playful, colorful accent piece. The matte chalk paint provides a smooth, velvety finish that can be layered for depth. Hardware can be replaced with fun handles in contrasting colors or metallic finishes for extra flair.
This technique suits a range of styles—from boho and shabby chic to modern eclectic. Use bold colors for statement pieces or softer shades for a more subtle effect. Don’t shy away from mixing colors—try a color-blocked wardrobe or a multicolored chair. Seasonal accents like pastel shades in spring or deep jewel tones in winter can refresh the look.
Start by cleaning and lightly sanding the furniture to ensure paint adherence. Use high-quality chalk paint for smooth coverage and minimal prep. Apply with a brush or foam roller in even strokes, allowing each coat to dry thoroughly. For a distressed look, lightly sand edges once dry. Finish with a clear wax or sealant to protect your work and add a soft sheen.
Add decorative touches like stenciled patterns, floral motifs, or even personalized initials. Swap out old hardware for colorful knobs or vintage-inspired handles. Incorporate fabric-lined drawers or painted inside surfaces for a surprise pop of color. It’s all about making each piece reflect your style.
Upcycled furniture with vibrant chalk paint makes your space truly one-of-a-kind. It’s a rewarding project that proves you can transform anything with creativity and a little paint. Feel confident stepping into a room filled with personalized, eco-friendly decor that screams your personality.
2. Customized Wall Decals and Vinyl Stickers
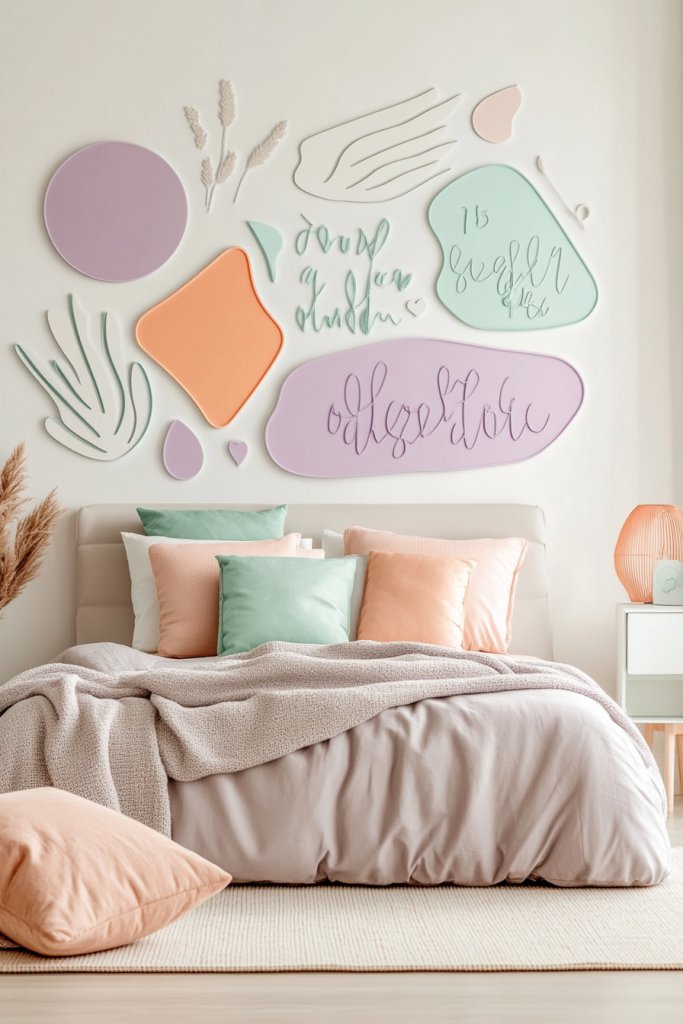
Looking for a quick way to personalize your space without commitment? Customized wall decals and vinyl stickers let you add your favorite themes, quotes, or abstract designs instantly. They’re perfect for renters or anyone who loves changing decor frequently. Plus, they’re super affordable and mess-free.
Imagine a wall adorned with whimsical unicorns, inspiring quotes, or geometric patterns in bold colors. Stickers can be arranged in playful clusters or sleek linear arrangements, depending on your style. They cling smoothly without bubbles and peel away cleanly when you want a new look. The stickers add dimension and personality without damaging paint or wallpaper.
Choose themes that match your personality—florals for a soft vibe, space motifs for a futuristic touch, or motivational words for an inspiring corner. You can layer stickers for a collage effect or keep it minimal with a single quote. Change themes seasonally, like snowflakes in winter or tropical designs in summer. They’re versatile and easy to switch up.
Start by selecting high-quality decals from reputable sources or design your own online. Clean the wall surface thoroughly to ensure adhesion. Use a ruler or level to align decals perfectly, especially for quotes or larger designs. Peel and stick carefully, smoothing out air bubbles with a credit card or smoothing tool. For intricate designs, follow the manufacturer’s instructions for best results. Removing decals is just as easy—heat gently and peel away without residue.
Create custom decals with your own artwork or favorite sayings. Add metallic or holographic finishes for extra sparkle. Combine decals with other decor elements like fabric wall hangings or shelving for layered interest. Use different textures or matte finishes to enhance the visual appeal. Personal touches turn decals into a signature feature.
Custom decals are an effortless way to showcase your style and mood. They’re a budget-friendly and flexible decor option that can evolve with your taste. Feel empowered to design your own or mix and match themes—your room, your rules!
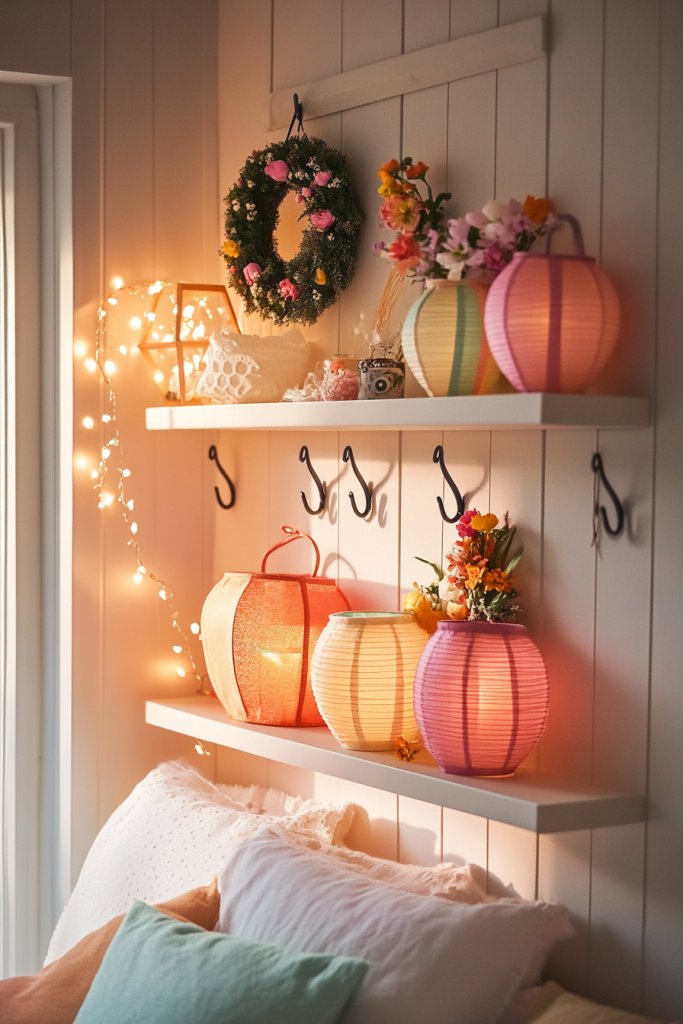
3. Artistic Shelving with Personal Collections
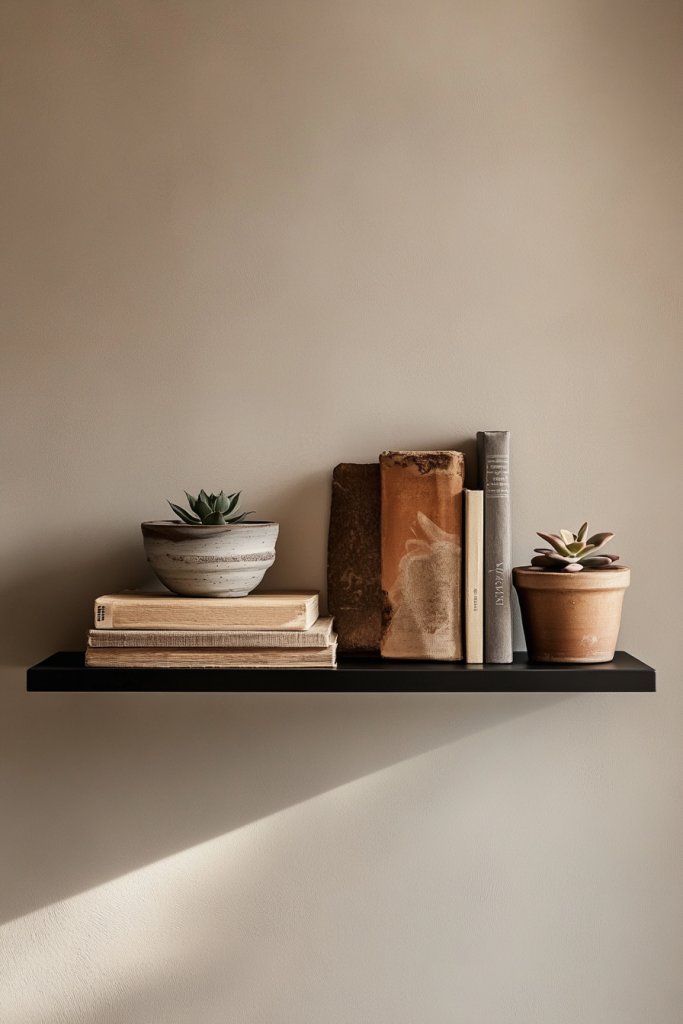
Feeling like your bedroom is missing that personal touch? Artistic shelving provides a perfect opportunity to showcase your favorite collections and add visual interest. It’s a functional decor element that makes your space feel curated and uniquely yours. Plus, it’s a great way to organize in style.
Imagine floating shelves painted in bold colors or sleek wood tones, holding a mix of books, crafts, or souvenirs. Add decorative brackets or geometric shapes for a modern edge. Layer objects at different heights—like small sculptures, framed photos, or colorful boxes—for a dynamic display. The shelves become a mini gallery that reflects your personality.
Use open shelving for a casual, eclectic look or install a wall-mounted unit with hidden storage. Choose materials that match your room’s vibe—rustic wood, glossy lacquer, or matte metal. Change the display seasonally by swapping objects or rearranging layers. For small spaces, vertical shelving maximizes storage without clutter.
Start by measuring your wall space and selecting suitable shelves—consider weight limits. Use a level for precise installation, and anchor securely into studs or wall anchors. Arrange your collections thoughtfully, balancing size and color for aesthetic appeal. Incorporate decorative elements like LED strips (if allowed) or painted backings for extra flair. Keep shelves clean and dust-free for long-term beauty.
Paint the shelves in your favorite hues or add wallpaper backing for depth. Mix functional items like baskets or boxes with decorative pieces. Incorporate personal memorabilia—like travel souvenirs or artwork—to make it truly yours. Use LED lights or small spotlights to highlight favorite items. The goal is a balanced, personalized display.
Artistic shelving turns your collections into a curated showcase and adds a design statement. It’s a simple project that can be customized endlessly and makes your room more inviting. Show off what you love and create a space that truly feels like home.
4. Color-Themed Storage Solutions with Bins and Baskets
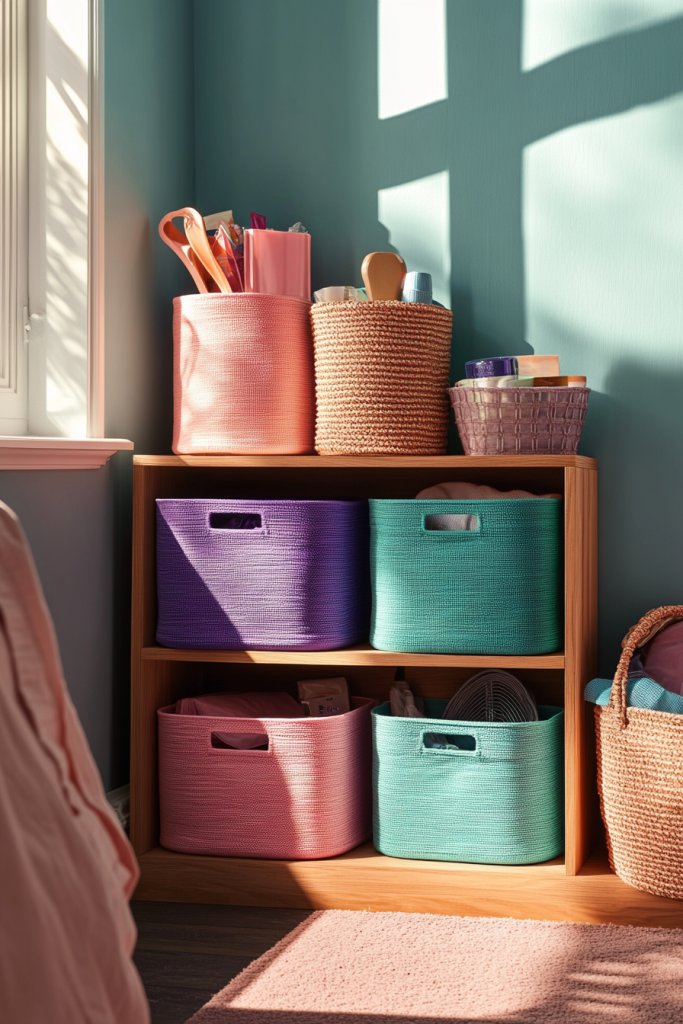
Clutter can turn any room into chaos quickly. Color-themed storage solutions with bins and baskets help organize your belongings while adding a splash of style. They make tidying up easier and create a cohesive look that ties your room together. Plus, they’re versatile and inexpensive.
Picture a series of woven baskets in pastel shades neatly stacked on shelves or tucked under a vanity. Or vibrant plastic bins in bold primary colors placed in corners for quick access. The uniformity of color creates a calming or playful effect, depending on your palette. These containers hide messes and keep your essentials within reach, all while looking cute.
Choose soft, muted tones for a soothing vibe or bright hues for energy. Mix and match textures—woven, fabric-lined, or smooth plastic—to add depth. Use color coding for different categories—e.g., pink for accessories, blue for school supplies. Seasonal swaps or label additions keep things fresh and functional. Stack or nest for space efficiency.
Start by decluttering and sorting your items. Select bins and baskets that fit your storage needs and style preferences. Arrange them on open shelves, under beds, or inside closets for maximum impact. Consider stackable options to save space. Label containers with adhesive labels or chalkboard tags for easy identification. Regularly revisit and reorganize to maintain order.
Add decorative touches like fabric liners or personalized tags. Coordinate the colors with your room’s theme for a harmonious look. Incorporate clear containers to easily see contents. Use decorative tapes or painted labels to customize plain baskets. Personal touches make storage both functional and fun.
Color-coordinated storage turns clutter into a design element and boosts your organizational confidence. It proves that tidying up can be stylish and satisfying. Your room will look more spacious and inviting—ready for anything life throws at you!
5. Themed Corner with Hobby or Interest Displays

Want to make your bedroom a reflection of your passions? Creating a themed corner dedicated to hobbies or interests adds personality and purpose. It’s a fun way to showcase your talents and inspire you daily. Plus, it keeps clutter organized in a dedicated space.
Visualize a corner with a small desk or shelf filled with musical instruments, art supplies, or sports gear, all arranged with flair. Use colorful storage bins, decorative hooks, and themed accessories to set the mood. Hang framed posters or banners that represent your passion. This dedicated space becomes a mini sanctuary for your favorite activities.
For a music lover, display your instruments, sheet music, and band posters. For an artist, set up a creative station with paints, brushes, and sketches. Sports fans can showcase jerseys, trophies, or equipment with themed decor. Adapt the space seasonally, adding new elements or changing displays for freshness. Keep it functional yet inspiring.
Choose a corner that’s accessible and visually prominent. Use shelves, pegboards, or cubbies to organize supplies and gear. Decorate with themed posters, banners, or wall decals that match your hobby. Incorporate functional storage like bins or baskets for smaller items. Keep the area tidy and inviting, adding new elements as your interests evolve. Regularly update to keep the space fresh.
Add custom signs, painted motifs, or DIY decor pieces that reflect your personal style. Use themed lighting or decorative elements like flags or fabric backdrops. Incorporate your own artwork or memorabilia for a personal touch. Use color schemes that match your hobby’s vibe—vibrant for energetic pursuits or muted for calming activities. Make the space uniquely yours.
A themed corner celebrates your passions and turns your room into a motivating space. It’s a creative project that showcases your personality and talents. Feel proud to share your interests and enjoy a space that truly inspires you every day.
6. Fabric-Covered Cork Boards and Pinboards for Inspiration
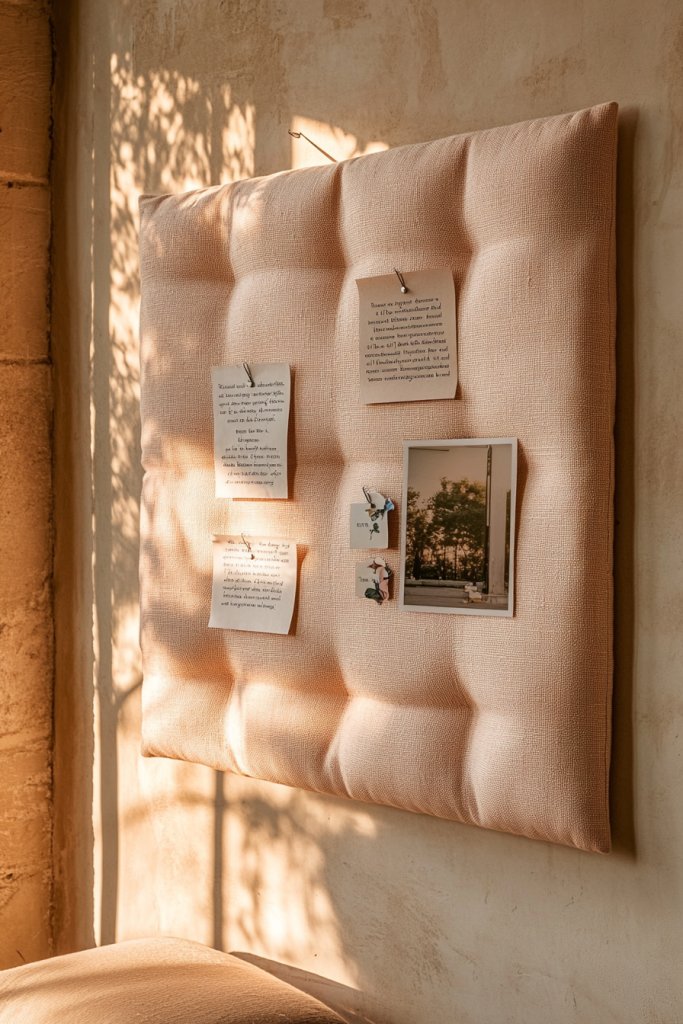
Need a stylish way to keep track of ideas, quotes, or reminders? Fabric-covered cork boards and pinboards are a chic solution that combines function with decor. They help organize your thoughts and inspiration while adding texture and color to your walls. Best of all, they’re easy to customize.
Imagine a cork board covered in vibrant floral fabric, displaying photos, sketches, and inspirational notes pinned neatly. Or a geometric patterned fabric that complements your room’s style, with pins holding key reminders. The fabric adds softness and style, transforming a plain board into a textured art piece. You can layer different fabrics or add decorative borders for extra flair.
Choose fabrics that match your room’s palette—bold prints for a lively look or muted tones for subtlety. Change the fabric seasonally or for special occasions. Use decorative pins, clips, or washi tape to add variety. For a clean look, keep the layout organized; for a creative vibe, cluster items in a freeform arrangement. It’s a flexible display solution.
Cut fabric slightly larger than your cork board, then stretch and glue it around the edges using spray adhesive or a hot glue gun. Add trim or decorative tapes for finishing touches. Mount the board with hooks or adhesive strips, ensuring it’s secure and level. Decorate with a mix of pinned items—notes, photos, or small keepsakes—to keep it dynamic. Regularly refresh by swapping out pinned items.
Use themed fabrics or add painted designs to match your decor. Incorporate washi tape frames or decorative borders to enhance visual appeal. Personalize with hand-painted quotes or doodles on the fabric. Arrange items thoughtfully for inspiration and motivation. It’s a customizable, functional art piece that evolves with you.
A fabric-covered cork board is a practical yet stylish way to stay inspired. It encourages organization and creativity, making your space more productive. Feel proud of your personalized display that can be updated easily as your ideas change.
7. Eco-Friendly Decor with Recycled Materials
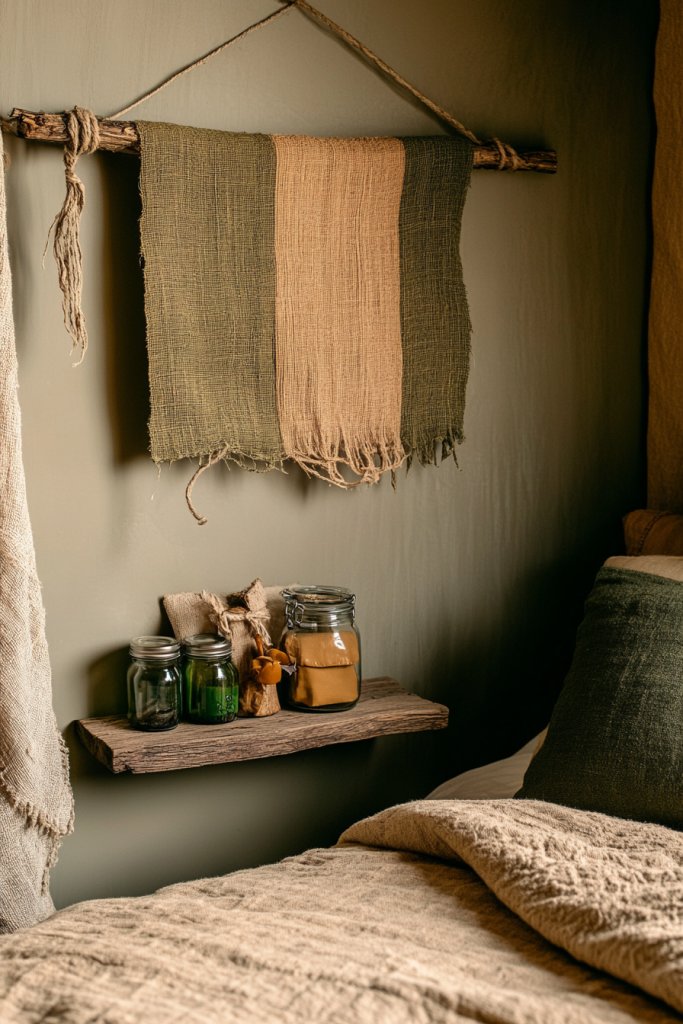
Want to decorate sustainably while still making a bold statement? Eco-friendly decor using recycled materials can transform your room into an environmentally conscious haven. It’s a way to reduce waste and showcase your creativity all at once. Plus, it’s a fun challenge for any DIY lover.
Picture a wall display of photo frames made from reclaimed wood or cardboard, decorated with paint or fabric scraps. Or a hanging mobile crafted from bottle caps, paper, or fabric remnants, adding movement and color. Repurposed jars or tins can serve as storage or decorative accents, filled with DIY elements like shells, stones, or fabric pieces. It’s a colorful, textured, and meaningful aesthetic.
Use natural textures and earthy tones for a calming, organic look, or add pops of bright color for vibrancy. Incorporate recycled textiles for pillow covers, wall hangings, or table runners. Change your decor with the seasons by swapping out materials or colors, keeping your space fresh and eco-conscious. Mix different recycled sources for an eclectic vibe.
Collect recyclable materials—like glass jars, cardboard, or old textiles—and clean them thoroughly. Use non-toxic paints, glues, and finishes to customize your pieces. Create wall art by painting or decorating recycled boards or panels. Use eco-friendly adhesives or mounting hardware to hang your creations securely. Assemble your decor with care, combining textures and colors for maximum impact.
Add your own painted designs, fabric accents, or decorative touches to recycled items. Incorporate natural elements like stones, driftwood, or shells for added texture. Label containers with eco-friendly tags, or paint patterns directly onto recycled surfaces. Your decor will tell a story of sustainability and creativity.
Eco-friendly decor proves you can be stylish and sustainable. It’s a meaningful way to express your values and inspire others. Feel confident knowing each piece has a story, and your space is both beautiful and environmentally responsible.
8. Themed Bedding with DIY Pillow Covers and Throws
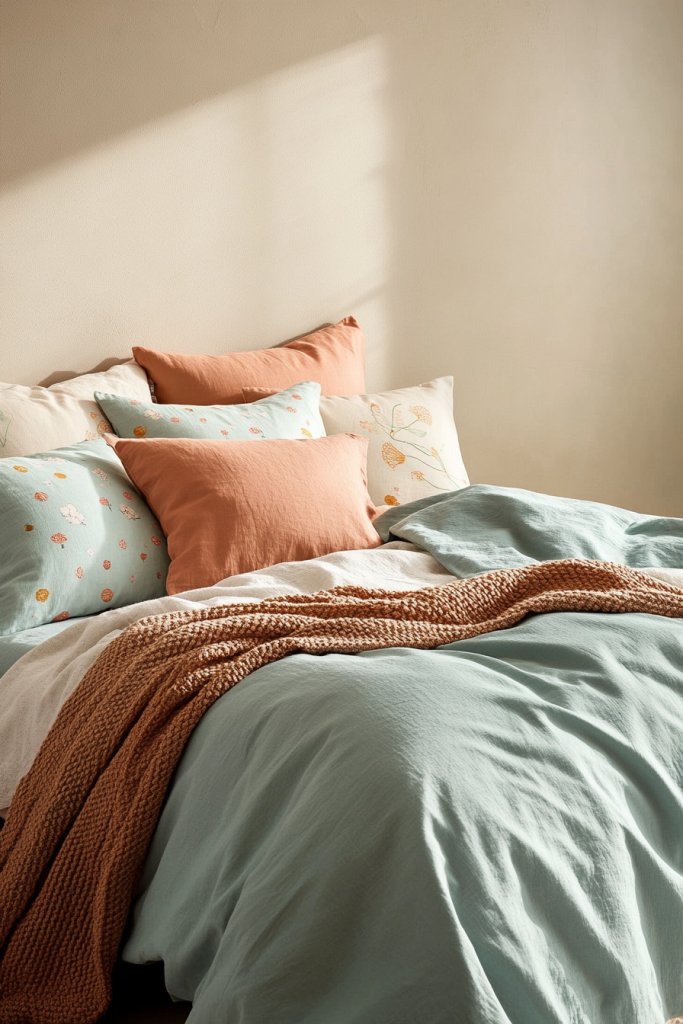
Bedding sets can be so boring, right? A themed bedding collection, complemented with DIY pillow covers and throws, instantly refreshes your room and expresses your personality. It’s a quick project that can make your space look coordinated, cozy, and totally you. Plus, you get to unleash your inner designer.
Picture a bed dressed with a vibrant, printed duvet matching your favorite theme—like floral, nautical, or boho. Add pillow covers crafted from patterned fabrics, layered artfully for depth. Include a textured throw blanket in complementary colors, casually draped for a relaxed vibe. The mix of patterns and textures creates a layered, inviting look that screams comfort and style.
Select fabrics that reflect your mood—bright and playful for fun, muted and textured for calm. Create or customize pillow covers with fabric paints, embroidery, or sewing. Switch out throws seasonally, such as lightweight cotton in summer or plush fleece in winter. Mix patterns and solids for a balanced design. Use decorative trims or tassels for added flair.
Start with a base bedding set that fits your room’s color scheme. Sew or glue fabric pieces onto plain pillow covers for a personal touch. Use a sewing machine or hand-stitch for durability. For throws, layer different textures or colors, or make your own from leftover fabrics. Arrange everything neatly but casually for an inviting look. Incorporate decorative pillows for added comfort and style.
Add embroidered initials, patches, or painted designs to your pillow covers. Use trims like pom-poms, fringes, or ribbons to customize. Incorporate themed motifs—stars, hearts, or geometric shapes—that match your decor. Personal touches like photos or small charms sewn onto pillows add sentimental value.
Themed bedding with DIY accents makes your bedroom uniquely yours and super cozy. It’s a creative outlet that also enhances comfort. Feel proud of your personalized, stylish retreat—your space, your rules!
9. Colorful Curtain Designs with Unique Tiebacks
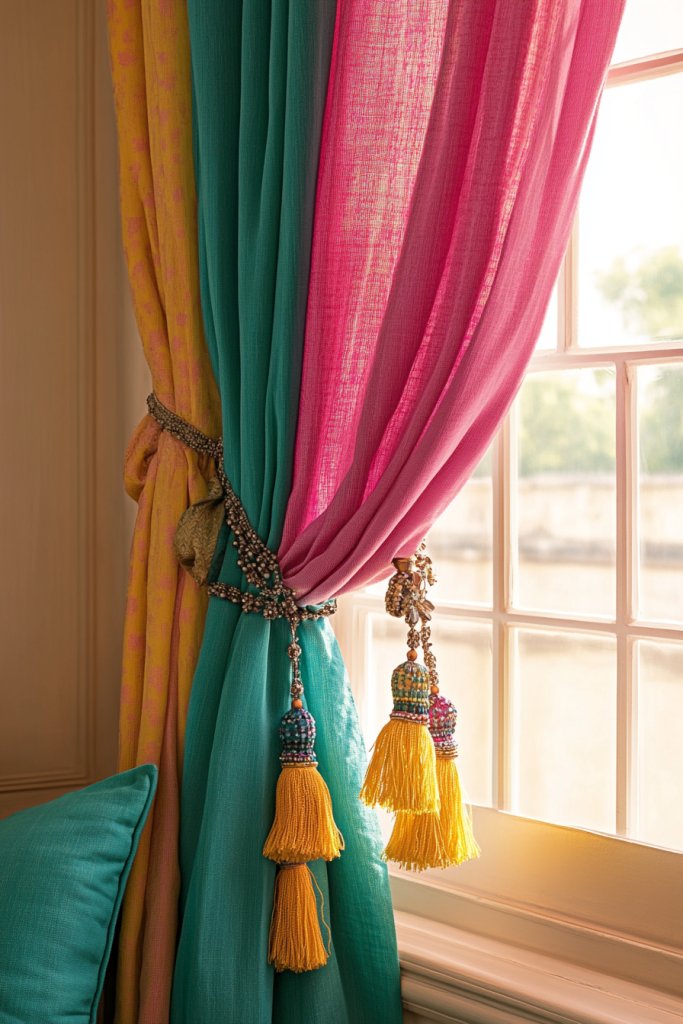
Plain curtains can make a room feel dull or uninspired. Colorful curtains with unique tiebacks instantly boost your decor and add a playful or elegant touch. They frame your windows beautifully and reflect your personality. Plus, they’re simple to update for any season or mood.
Imagine curtains in a bold, patterned fabric pulled back with decorative tiebacks like tassels, ropes, or fabric strips. The fabric’s color and texture add a layer of richness to your room, while the tiebacks create a focal point. The way you style them can be relaxed and casual or chic and structured, depending on your taste.
Choose fabrics that complement your room’s palette—sheer for a light, airy feel or heavy velvet for drama. Use contrasting or matching tiebacks, or craft your own from fabric scraps or cords. Change up the look seasonally—light and breezy in summer, plush and layered in winter. Add decorative tassels or beads for extra flair.
Select curtains in your preferred colors and lengths, then hang using stylish rods or tension wires. Secure tiebacks with hooks or loops, making sure they are adjustable. Use decorative knots or bows for a polished look. For a personal touch, craft your own tiebacks with beads, ribbons, or embroidery. Adjust the fabric to create flattering folds and drapes.
Create custom tiebacks from favorite fabrics or add embellishments like charms or beads. Layer curtains with different textures or colors for a richer look. Incorporate seasonal accents by swapping out tiebacks or adding small decorative charms. Personal touches elevate simple curtains into statement pieces.
Colorful curtains with unique tiebacks frame your windows beautifully and add personality. They’re an easy way to refresh your decor and experiment with color and texture. Feel confident in mixing and matching styles—your windows will thank you!
10. Artistic DIY Jewelry and Accessory Organizers
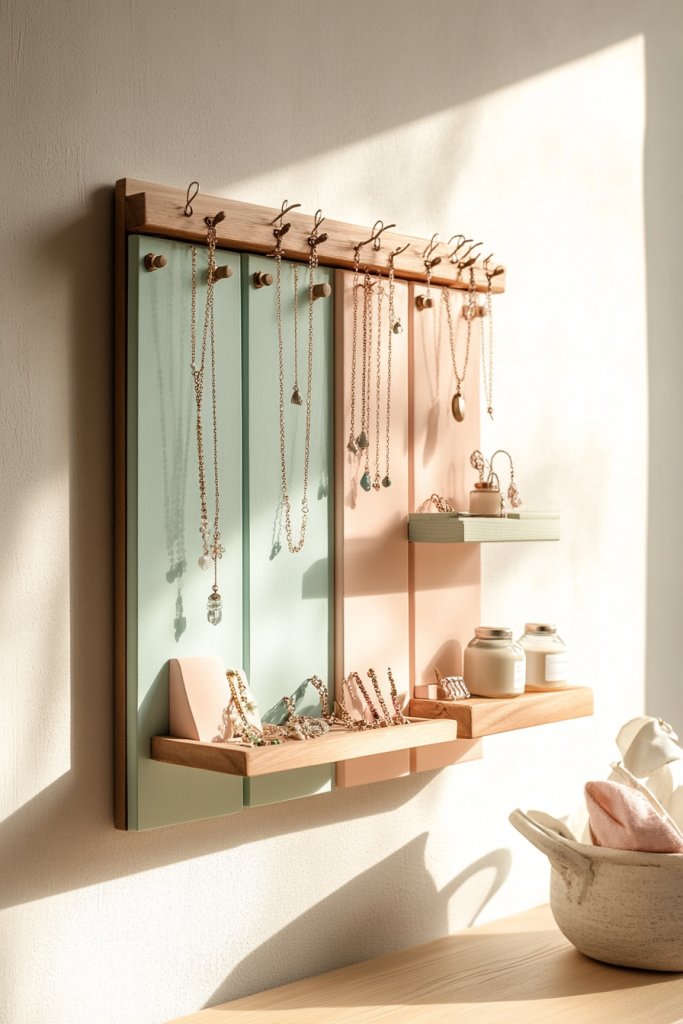
Tired of tangled necklaces and scattered accessories? Artistic DIY organizers keep your jewelry tidy and turn a cluttered drawer into a mini art display. It’s a practical project that adds a personal touch to your bedroom. Plus, it’s a fun way to showcase your creativity.
Picture a wall-mounted board with painted or decoupaged sections, featuring hooks, knobs, or small shelves for your jewelry. Or a jewelry tree crafted from wire or wood, decorated with beads and fabric for a whimsical vibe. Use colorful pins, clips, or hooks to hang necklaces, bracelets, and earrings, turning everyday accessories into art.
Create a sleek, modern look with metallic or painted wood organizers, or go boho with woven or fabric-covered displays. Incorporate compartments, drawers, or small baskets for additional storage. Personalize with your favorite colors, patterns, or motifs—think stars, hearts, or floral designs. Adapt to your space—over-the-door racks, wall-mounted boards, or tabletop stands.
Gather craft supplies like wood or foam boards, paint, hooks, and decorative elements. Design your organizer on paper first, then cut and assemble your pieces. Paint or decorate according to your style. Mount on the wall or set on your dresser, arranging hooks and shelves for easy access. Add small labels or tags for organization if desired. Regularly update to keep it fresh and functional.
Decorate with painted motifs, glitter, or fabric covers. Incorporate personalized charms or initials. Use color themes that match your room’s decor—pastels for softness, metallics for glam. Combine with mirrors or framed photos for a layered look that’s both functional and beautiful.
DIY jewelry organizers make your space look stylish while keeping your accessories accessible. They’re a creative project that boosts your organizational confidence. Enjoy showing off your personalized display and having everything in its place!
11. Cozy Nook with String Lights, Floor Cushions, and Personal Touches
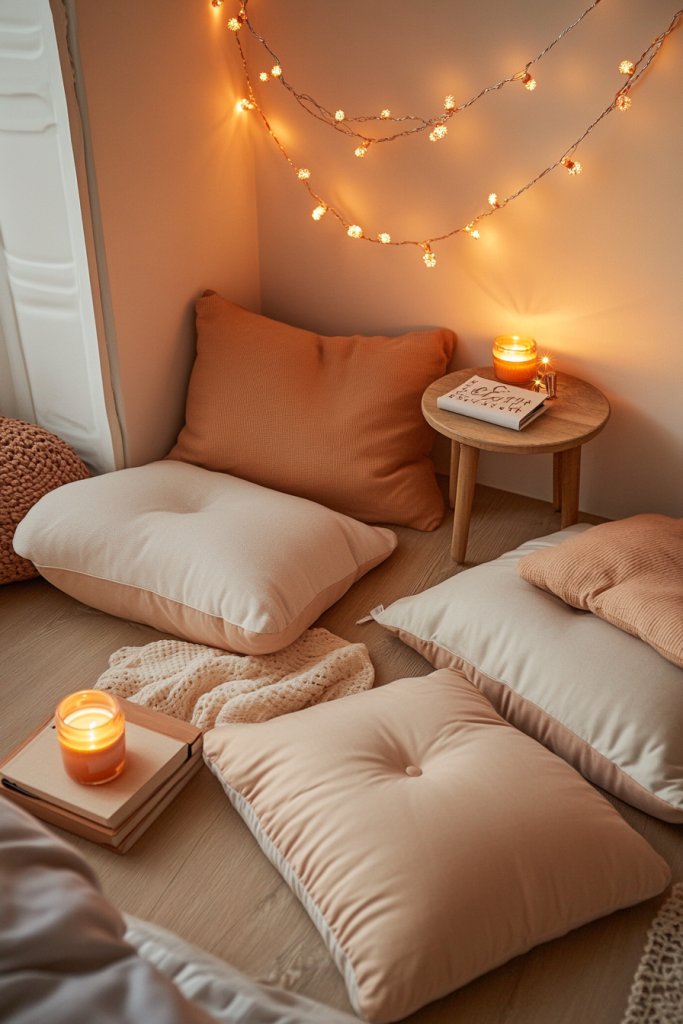
Craving a cozy corner to relax, read, or escape? A dedicated nook with soft cushions, gentle lighting, and personal touches creates the perfect retreat. It’s a small project that instantly makes your bedroom more inviting and functional. Plus, it’s a space you’ll love spending time in.
Imagine a corner with plush floor cushions in various textures and colors, topped with throws and pillows. String lights drape softly overhead or around the area, casting a warm glow. Add a small side table or a basket filled with your favorite books and toys. It’s a layered, inviting space that beckons you to unwind and be yourself.
Create a boho vibe with layered textiles, macrame accents, and colorful cushions. For a modern look, go minimalist with monochrome cushions and sleek lighting. Change your setup seasonally—light and airy in summer, cozy and plush in winter. Incorporate personal items, like a favorite plush or a photo collage, for a truly personalized corner.
Select a quiet corner with enough space for cushions and a small table. Use floor cushions, bean bags, or poufs in your preferred colors and textures. Hang string lights with command hooks or adhesive clips for easy setup. Add a throw blanket or a small rug to define the space. Keep it clutter-free and inviting; update the pillows or lights to keep the vibe fresh.
Decorate with your favorite plush toys, photos, or artwork. Incorporate themed cushions or blankets to match your interests. Use fairy lights or lanterns that you can adjust for different moods. Personal touches like a DIY sign or a framed quote can make it even more special. The nook becomes a reflection of your personality.
A cozy nook offers a dedicated space for relaxation and self-care. It’s a simple yet impactful way to make your room more inviting and personal. Feel confident creating a space that’s all about you—your perfect retreat awaits!
12. Seasonal Decor Swaps for Year-Round Creative Fun
Bored of the same old decor? Seasonal swaps keep your bedroom fresh, lively, and full of personality all year. They’re a fun way to celebrate holidays, seasons, or just your changing mood. Plus, they’re easy to do and cost-effective, making decorating an ongoing adventure.
Picture swapping out summer-themed accessories for cozy fall accents—think pumpkins and warm-colored textiles. Use removable wall decals, pillow covers, or table decor to reflect each season. Incorporate seasonal colors, motifs, and textures to create a dynamic, ever-evolving space. It’s like celebrating a new vibe every few months.
Decorate with natural elements—like pinecones or seashells—seasonally. Change pillowcases, throws, or curtains to match the mood. Use themed accessories like holiday banners, fairy lights, or plush toys. Keep a stash of versatile decor pieces to easily switch themes without cluttering your space. Adapt for major holidays or simple seasonal changes.
Organize your seasonal decor in labeled bins or drawers. Rotate accessories, textiles, and wall decals regularly, storing off-season items out of sight. Use wall hooks, command strips, or magnetic strips for easy swaps. Incorporate seasonal scents with candles or diffusers (if allowed) for added ambiance. Always keep a few neutral pieces for balance.
Mix in personal mementos and DIY elements that fit each theme. Add seasonal artwork or create DIY garlands and banners. Use color palettes that match your style—vibrant for summer, muted for winter. Personal touches like handmade ornaments or photo collages make each season special.
Seasonal decor swaps keep your space exciting and fresh, fueling your creative spirit. They show that decorating is an ongoing, enjoyable process. Feel confident experimenting with themes and styles—you’ll always have a reason to celebrate your space.
Conclusion
With a diverse array of girl bedroom ideas, from dreamy color palettes to creative decor touches, this guide offers endless inspiration to elevate any space. Feel empowered to try out these ideas and make your child’s room a true reflection of her personality and passions. Remember, a well-designed room not only looks beautiful but also nurtures confidence and happiness—so start transforming that space today and watch her imagination soar!
Leave a Reply