Ever wonder how some kitchens manage to look effortlessly tidy and inviting, even with busy households and endless ingredients? The secret often lies in a well-organized pantry—an appealing space that transforms chaos into calm and makes cooking a joy rather than a chore. Kitchen pantry organization has become a popular trend because it combines functionality with style, helping us maximize limited space while creating a visually pleasing environment.
Whether you have a tiny closet or a spacious walk-in, smart storage solutions can turn your pantry into a marvel of efficiency. In this article, you’ll discover a treasure trove of inspiration and practical ideas to elevate your pantry organization game.
From clever storage hacks to decorative touches, we cover a wide variety of strategies to suit any space and style. Get ready to explore innovative tips that can help you streamline your storage, keep everything easily accessible, and add a dash of personality to your kitchen—making it both beautiful and highly functional!
1. Incorporate Clear, Stackable Storage Bins for Easy Visibility
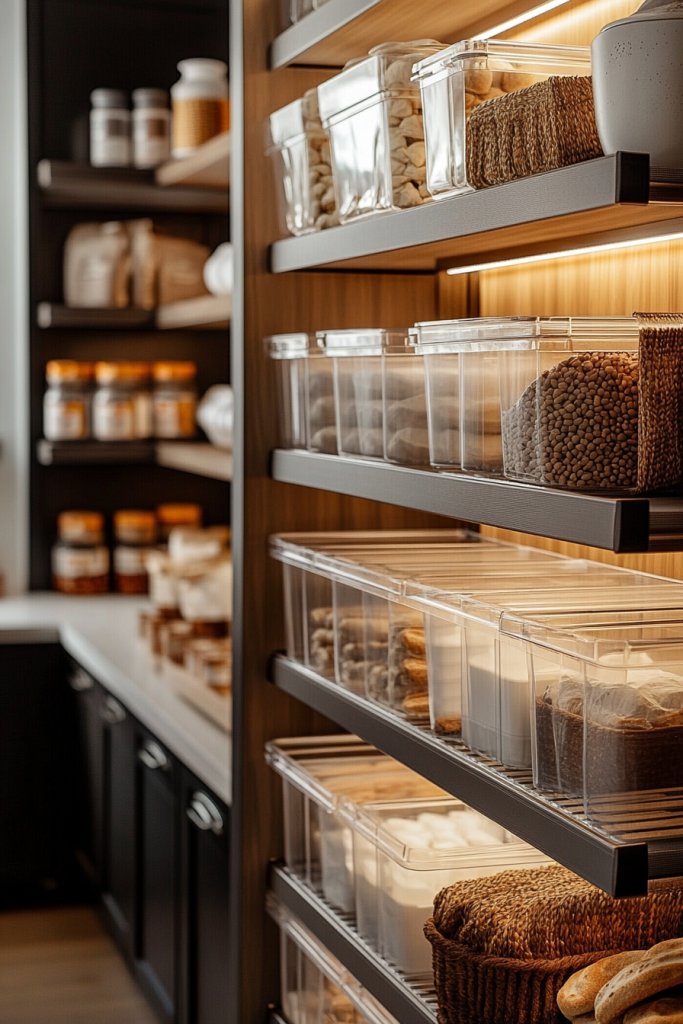
Maximizing visibility in your pantry can transform chaos into calm, making it easier to find what you need and keep everything tidy. Clear, stackable storage bins are a game-changer because they allow you to see the contents at a glance, saving time and reducing frustration when searching for snacks, grains, or baking supplies.
Imagine a set of sleek, transparent plastic bins, neatly stacked on open shelves or inside cabinets. Each bin is labeled with simple black or white tags, and their uniform shape creates a clean, organized look.
The clear material reveals colorful pasta, flour bags, or cereal boxes inside, while the stacking feature optimizes vertical space. The smooth texture of the bins contrasts nicely with the rougher wood shelves, and the overall atmosphere feels bright and airy, with the scent of fresh plastic and the visual satisfaction of order.
To implement, start by choosing clear, BPA-free plastic bins with secure lids and stackable edges. Measure your shelves or cabinet interiors to select appropriately sized containers.
Label each bin with a label maker or adhesive labels for quick identification. Group similar items—like snacks, baking ingredients, or canned goods—in separate bins for easy access.
For a budget-friendly option, repurpose clear food storage containers or use decorative acrylic boxes from home decor stores. Arrange the bins so that frequently used items are within easy reach, and enjoy the instant upgrade to your pantry’s look and feel.
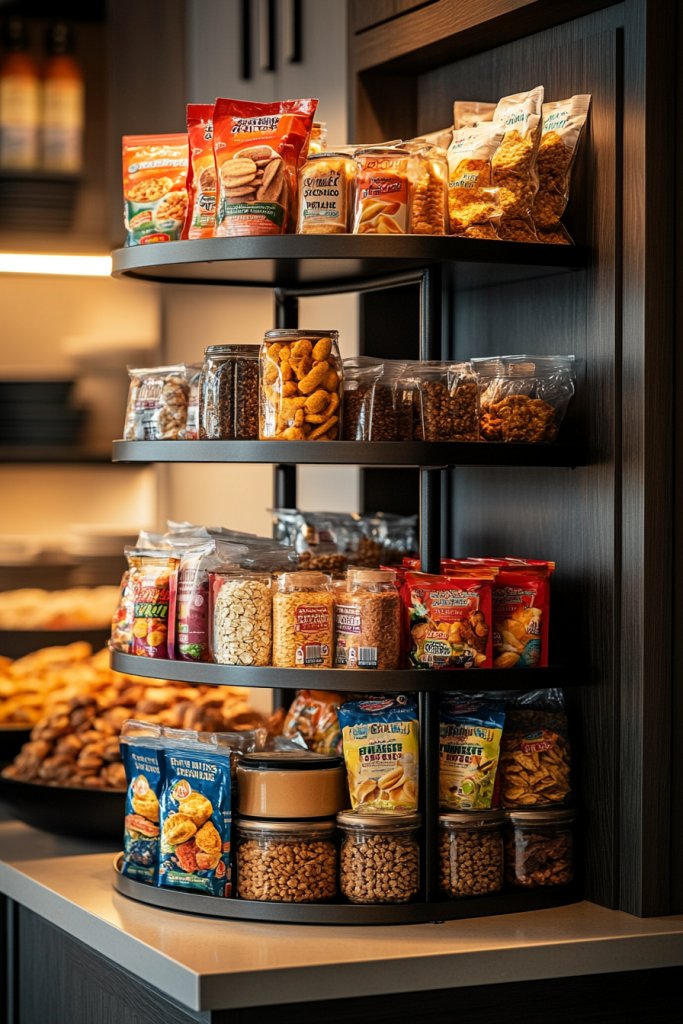
2. Use Lazy Susans to Maximize Corner Shelf Accessibility
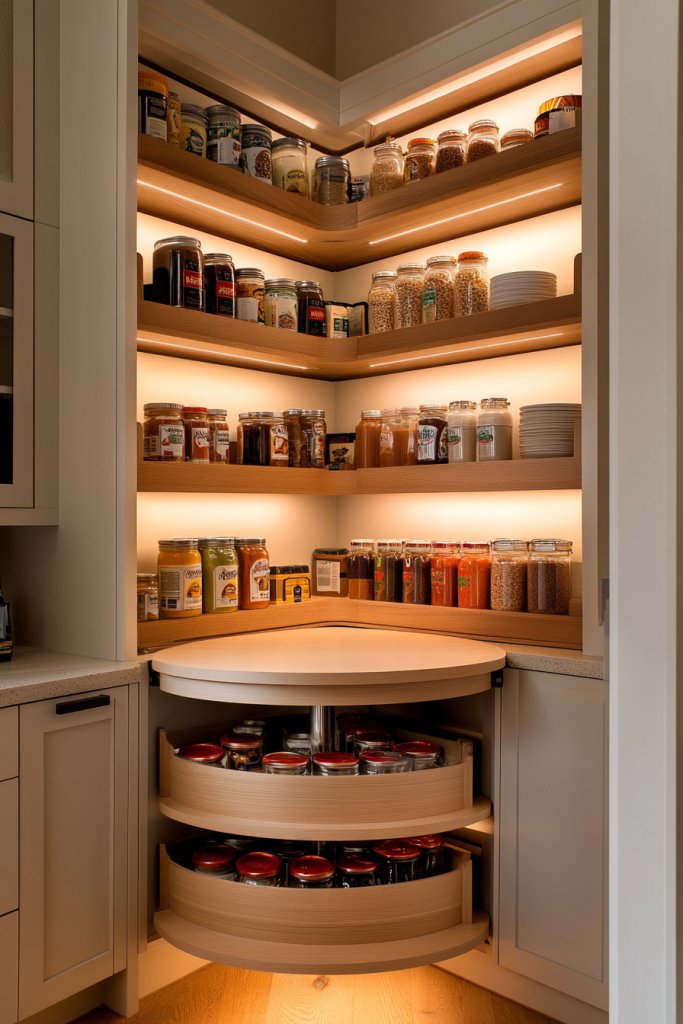
Corners are often the trickiest spots in a pantry, where items tend to get lost or buried behind others. Lazy Susans are an innovative solution that makes these hard-to-reach areas fully functional, turning dead space into a well-organized storage zone.
They allow you to spin and access everything without moving other items, saving time and effort. Visualize a polished wooden or sleek plastic Lazy Susan spinning smoothly on a corner shelf.
It holds a variety of jars, spices, or canned goods, arranged in a circular pattern for easy viewing. The top surface is smooth, with a slightly raised edge to prevent items from slipping off.
The rotation is silent and effortless, and the entire setup adds a touch of modern elegance to your pantry. The vibrant labels on jars—red pepper flakes, turmeric, or honey—stand out against the neutral background, creating a cheerful, inviting space with a satisfying tactile feel.
Getting started is simple: select a Lazy Susan that fits your corner space, ideally with a non-slip base for stability. Arrange your smaller items—spice jars, small cans, or condiment bottles—on its surface.
Group similar items together, and label each for quick identification. For added convenience, choose a Lazy Susan with a slightly raised edge to contain spills. Place it in the corner shelf, and enjoy effortless access to your pantry essentials while maintaining a sleek, uncluttered look.
3. Install Adjustable Shelving for Customizable Space Optimization
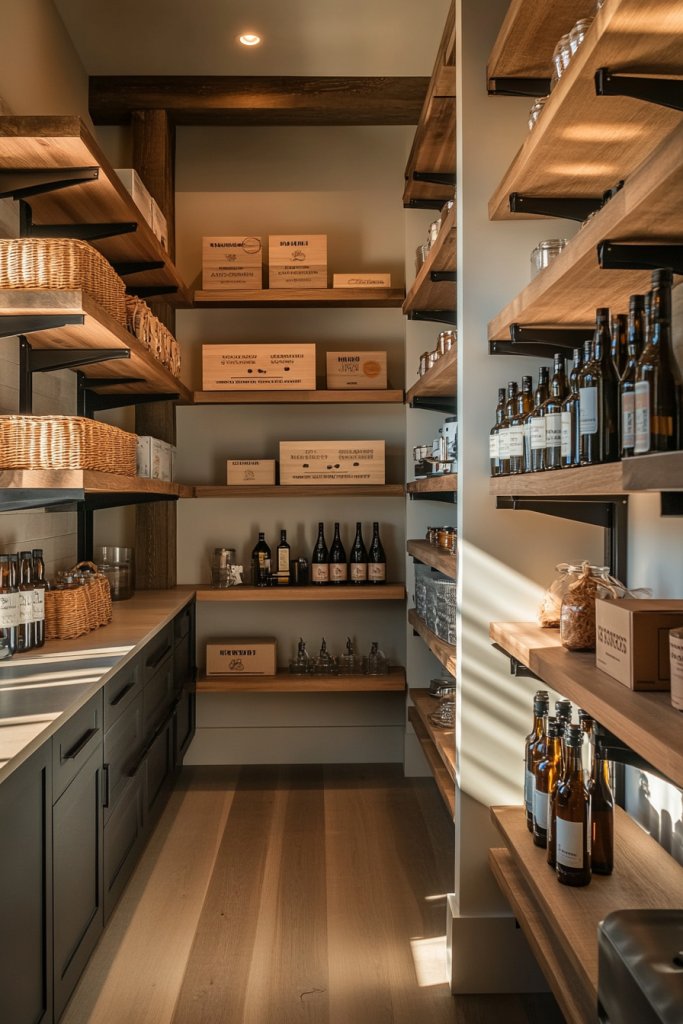
Every pantry is unique, which makes adjustable shelving an essential feature for flexible, efficient storage. Unlike fixed shelves, adjustable ones can be moved up or down to accommodate tall bottles, large containers, or seasonal items, ensuring every inch of space is utilized optimally.
Picture a pantry with sturdy metal or wood shelves that can be easily repositioned using a series of pegs or sliding tracks. The shelves are finished in neutral tones—white, natural wood, or matte black—that blend seamlessly with your decor.
Items like cereal boxes, glass jars, or baking trays sit neatly on these adaptable surfaces. The adjustable height creates a dynamic storage system, allowing you to customize your space based on your current needs.
The overall vibe is tidy and modern, with a sense of order and room for growth, all while the smell of fresh wood or painted surfaces adds warmth. To install, measure your pantry height and select adjustable shelf brackets compatible with your shelving material.
Use a level and drill to secure the brackets at your desired heights, then place your shelves on top. Consider investing in versatile shelving units with multiple levels or modular systems that can expand over time. Fill the shelves with your stored items, grouping similar categories, and enjoy the flexibility to reconfigure as your needs change—making your pantry truly tailored to your lifestyle.
4. Add Wall-Mounted Racks for Hanging Utensils and Small Items
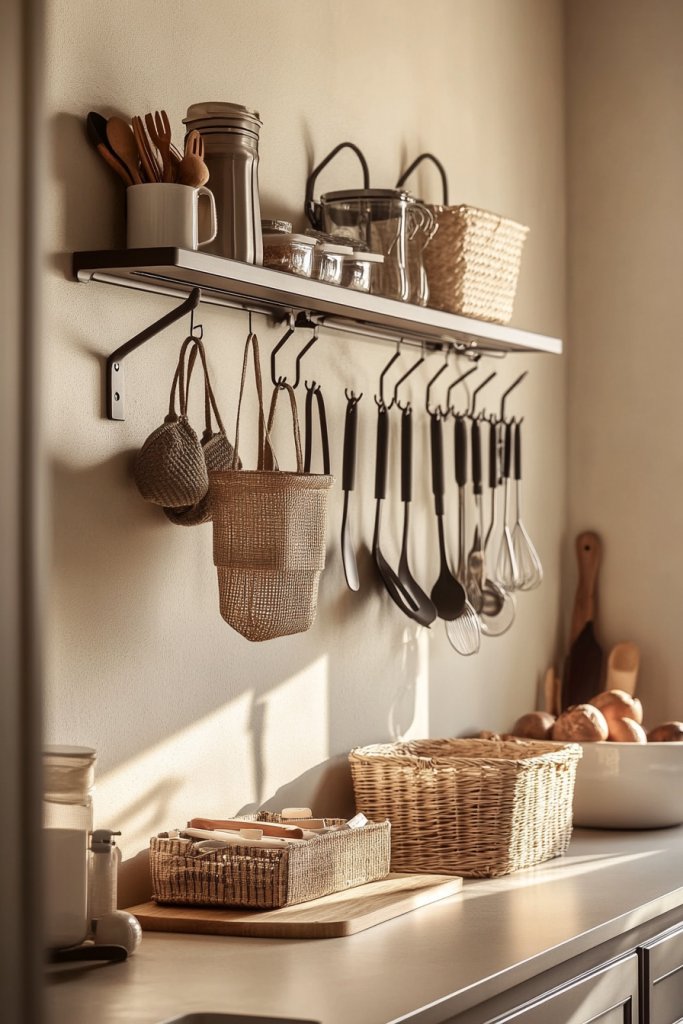
Maximize your pantry’s vertical space with wall-mounted racks, perfect for hanging utensils, small tools, or even lightweight baskets for extra storage. This approach keeps counters clear and essentials within arm’s reach, making your kitchen more functional and clutter-free.
Imagine a sleek metal or wooden rack mounted on the side wall or inside a cabinet door, featuring hooks or small shelves. It holds items like spatulas, measuring spoons, or even small spice tins.
The rack’s minimalist design—perhaps matte black or brushed nickel—adds a modern touch, while the tactile metal hooks or wooden pegs provide a warm, textured contrast. The space feels more open and accessible, with the gentle clink of utensils adding a subtle auditory cue of organization.
To implement, choose a wall-mounted rack or pegboard that fits your space and style. Secure it firmly to the wall at a comfortable height, ensuring easy access.
Hang your frequently used utensils, measuring cups, or small baskets for snacks or packets. Use sturdy hooks designed for the weight of your items, and consider adding labels to baskets or small containers for quick identification. This simple upgrade creates a more organized, efficient pantry where everything has a designated spot, and clutter is kept at bay.
5. Utilize Labelled Jars and Containers for Cohesive, Tidy Look
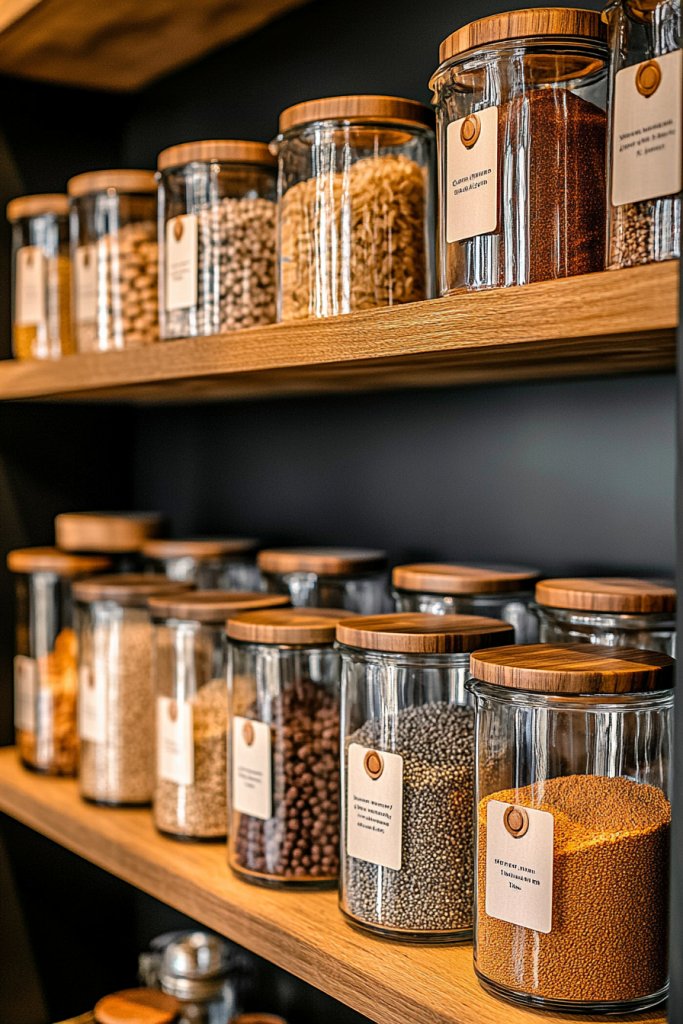
Using labelled jars and containers creates a unified aesthetic while making it easy to identify ingredients at a glance. This approach brings a sense of calm and order to your pantry, transforming it into a visually appealing space that’s both functional and stylish.
Visualize a row of glass jars with minimalist labels, filled with colorful rice, pasta, or dried beans. The jars are uniform in size, with clear glass bodies that showcase the contents, and topped with matching lids—perhaps in matte black, stainless steel, or cork for a rustic touch.
The labels are simple, perhaps handwritten with a chalk marker or printed with a sleek font, adding to the cohesive look. The arrangement invites a sensory experience; the sight of neatly organized jars, the faint aroma of grains, and the satisfying clink of glass create an overall feeling of serenity and control.
To achieve this, select clear glass or plastic containers with airtight lids for freshness. Use label makers, chalk markers, or printable labels to mark each jar clearly.
Group similar items—spices, baking supplies, snacks—and arrange them on open shelves or inside cabinets for visibility. For cost efficiency, repurpose old glass jars or purchase affordable sets from home goods stores. Consistently labelled jars not only elevate the look of your pantry but also make everyday cooking more efficient, with everything easy to find and put away.
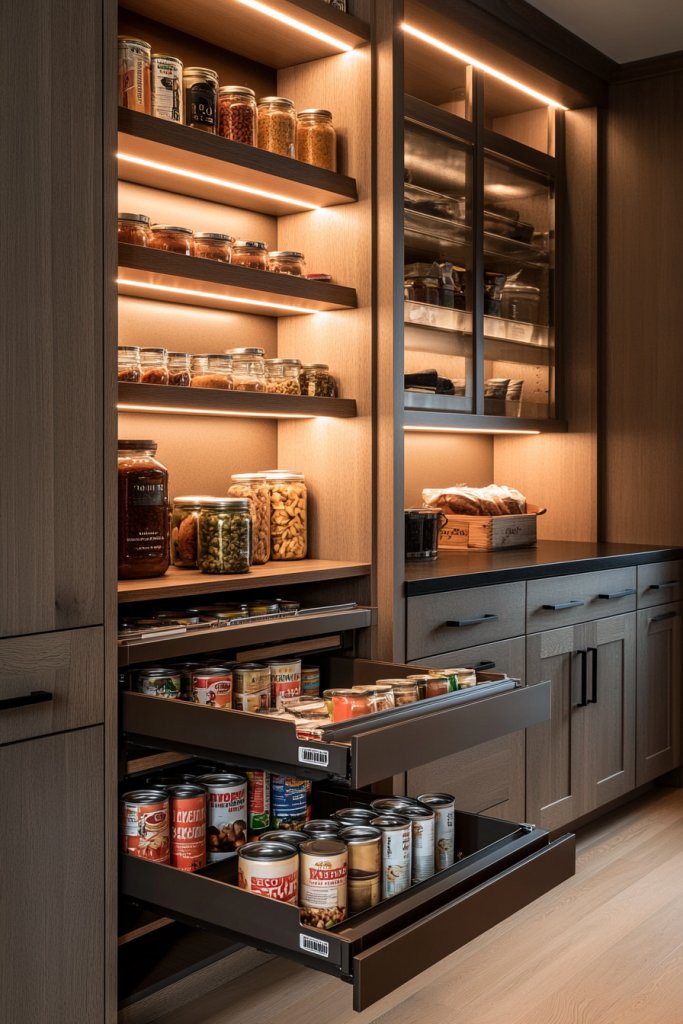
6. Incorporate Pull-Out Drawers for Hidden Storage Solutions
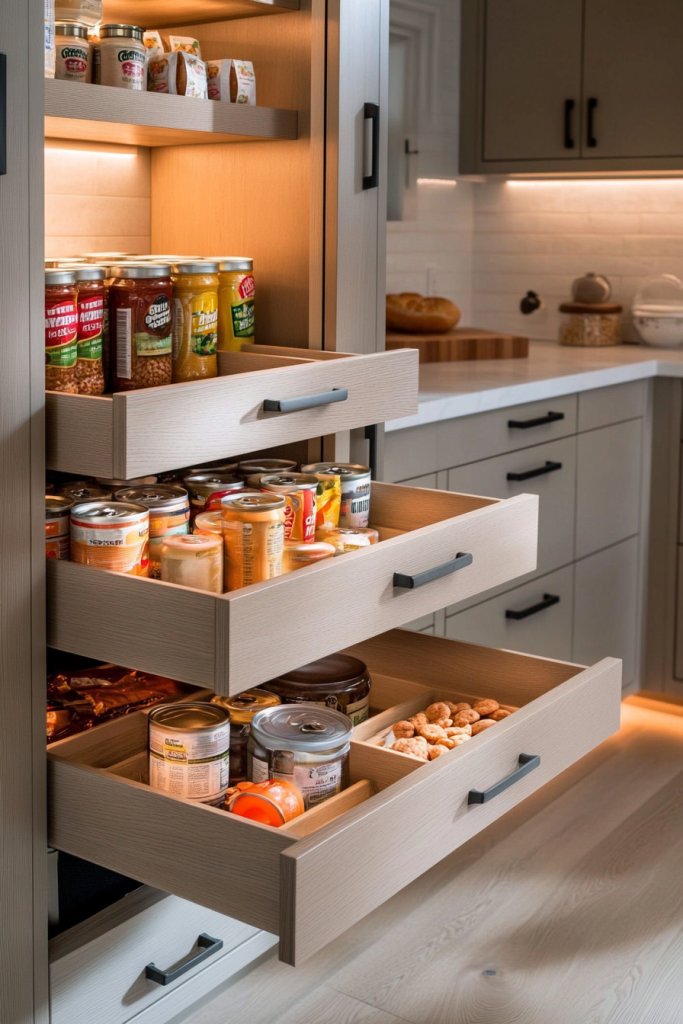
Maximizing storage in your pantry doesn’t mean sacrificing a sleek, clutter-free look. Pull-out drawers are a game-changer, seamlessly hiding less attractive items while keeping everything easily accessible.
They’re especially useful for small spaces or for items you want to keep out of sight but within arm’s reach. Imagine opening a smooth-gliding, matte-black drawer that reveals neatly organized rows of snacks, spices, or baking supplies.
The interior might feature dividers or small compartments made of wood or plastic, keeping everything in place. When closed, the drawer’s front blends with the surrounding cabinetry, maintaining a clean, minimalist aesthetic.
The soft sound of the drawer sliding out adds a satisfying tactile element to your routine. To implement, start with measuring your available space to choose the right size.
Purchase pre-made pull-out drawer kits or customize your existing shelves with slide rails from a hardware store. Install the rails securely to sturdy cabinetry or shelving, then insert your chosen drawers—wooden, plastic, or metal—based on your style and budget. For a beginner-friendly approach, consider using adjustable wire baskets or plastic bins with built-in slides, which are easier to install and still offer the same hidden storage benefit.
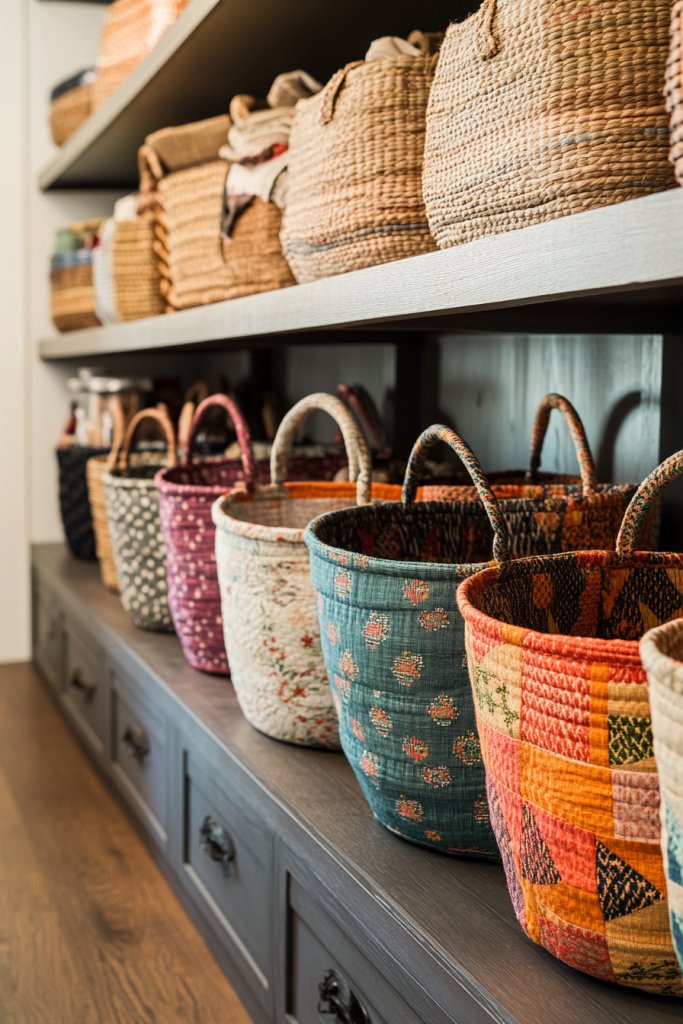
7. Use Decorative Baskets to Group Similar Items and Add Texture
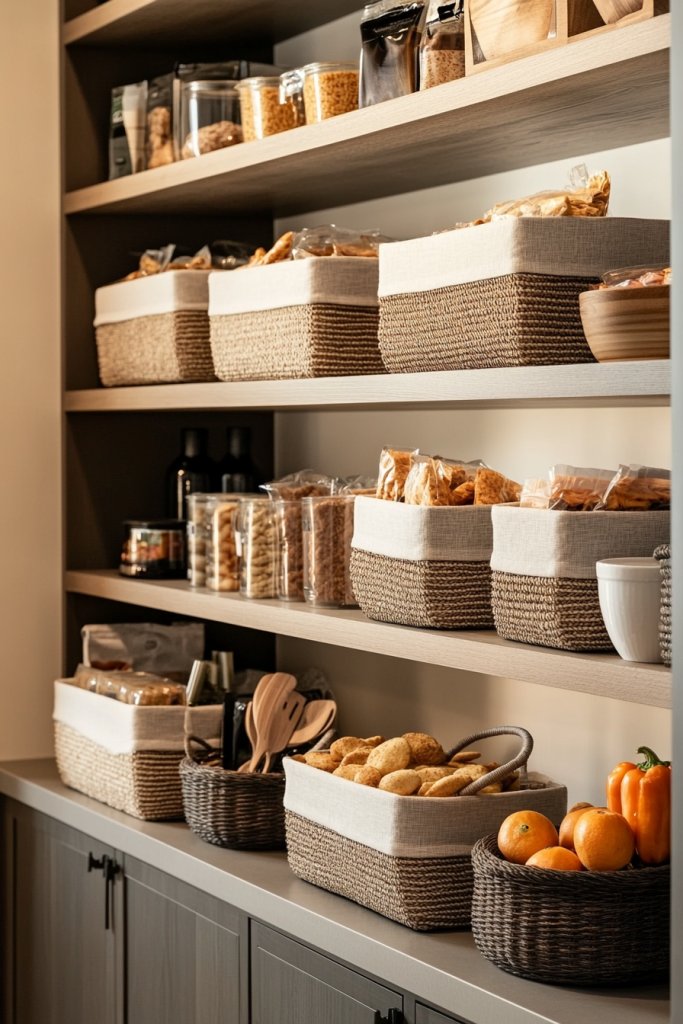
Decorative baskets are both practical and stylish, helping you group like items while adding warmth and texture to your pantry. They create visual boundaries, making your space look organized and inviting, especially when filled with snacks, produce, or kitchen towels.
Picture a row of woven rattan baskets in warm honey tones, each holding different categories—one for bread, another for dried fruits, and a third for small kitchen tools. The baskets’ textured surfaces contrast beautifully with smooth glass jars or sleek containers, adding depth and tactile interest.
Their rounded shapes soften the overall look, and their natural fibers evoke a cozy, rustic charm. When you open the door, the baskets’ rich textures beckon, making the space feel more curated and welcoming.
To incorporate, select baskets that fit your shelf width and height—rectangular, round, or oval shapes work well. Opt for materials like woven rattan, seagrass, or sturdy fabric-lined baskets for durability.
Group similar items inside each basket for easy retrieval, and label them with chalkboard tags or decorative labels for added charm. For a budget-friendly option, repurpose storage bins or baskets from other areas of your home, or shop thrift stores for unique, textured finds that add personality to your pantry.
8. Implement Tiered Shelf Risers to Maximize Vertical Space
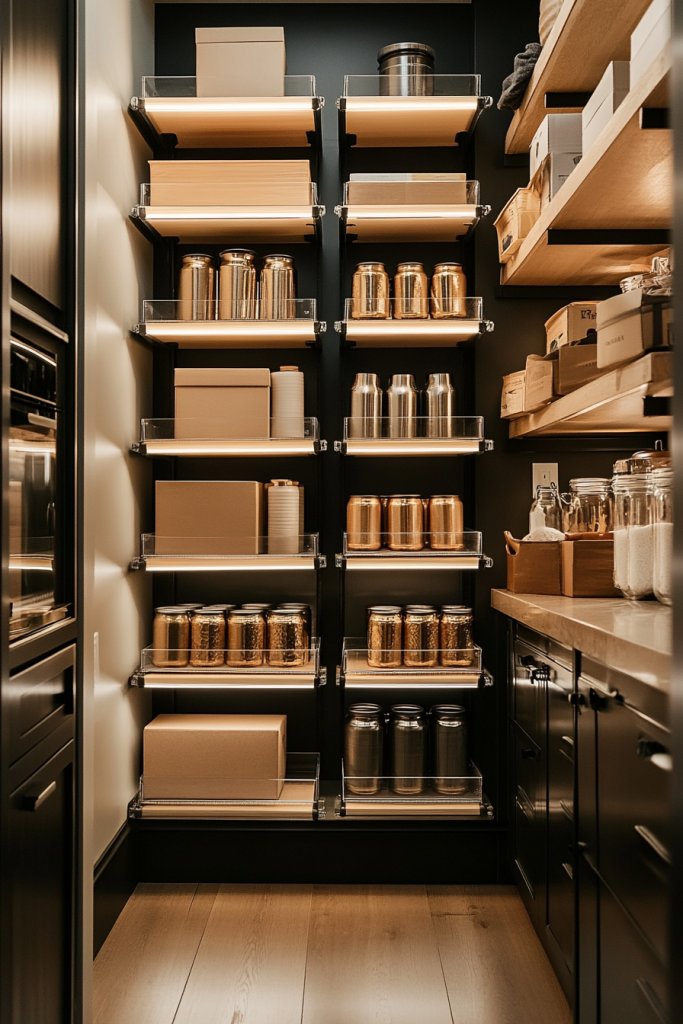
Tiered shelf risers are an efficient way to utilize vertical space in your pantry, allowing you to see and access more items without stacking everything into a confusing pile. They’re perfect for arranging canned goods, spice jars, or small boxes, making your pantry feel more organized and spacious.
Visualize a set of clear acrylic or wire risers placed in front of your shelf. They elevate items like spice bottles or small jars, creating multiple layers that are easy to view at a glance.
The risers have a slight incline or tiered steps, so each item is visible without moving others. The transparent or metallic finish adds a modern touch, and the layered arrangement creates a sense of order and purpose in your storage.
Getting started is simple: measure your shelf depth and width, then select risers that fit well. You can find these in various materials—clear acrylic, wire, bamboo, or plastic—to match your pantry’s style.
Place them directly on shelves, and organize your jars or cans on each tier. For added stability, secure risers with adhesive pads or non-slip feet. This small upgrade makes a big difference in both functionality and aesthetic appeal, especially for small or cluttered spaces.
9. Install Under-Shelf Hooks for Extra Storage of Small Tools and Bags
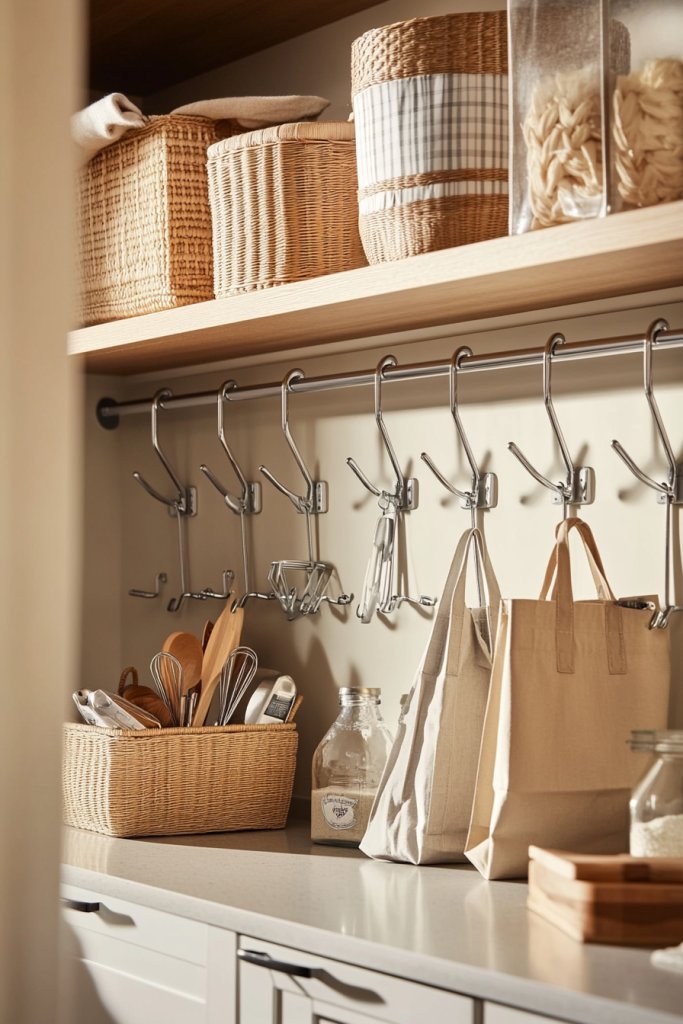
Under-shelf hooks are a smart, space-saving solution that adds extra storage without cluttering your countertop or cabinet doors. Perfect for hanging small tools, reusable shopping bags, or even kitchen towels, they help keep your essentials within reach and your shelves tidy.
Picture a sturdy metal hook clipped underneath a sturdy shelf, with a set of reusable cloth bags hanging neatly beneath. Or imagine small utensils like measuring spoons, hanging from hooks affixed underneath a shelf, freeing up drawer space.
The hooks come in various styles—metal, plastic, or silicone—and can be easily snapped or screwed into place, offering versatile options for different shelf types and weights. They introduce an unexpected layer of organization, making your pantry look more streamlined and functional.
To install, choose hooks that fit your shelf thickness—most are adjustable or come with screws or clips. Simply slide or screw them under your existing shelves, making sure they’re secure.
Use them for lightweight items like measuring cups, keys, or small kitchen gadgets. For added convenience, group similar items—like all your tea infusers or spice scoops—on dedicated hooks.
This simple upgrade turns unused space into valuable, accessible storage, making your daily routine more efficient. Let me know if you’d like me to continue with the remaining subheadings!
10. Use Magnetic Strips for Storing Metal Items and Small Accessories
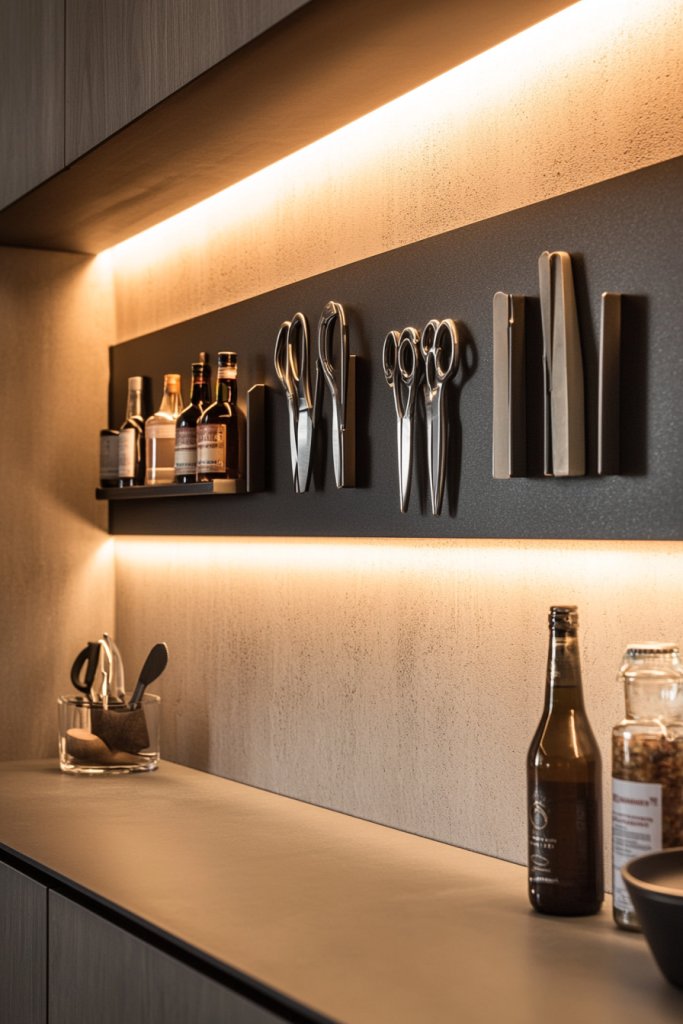
Magnetic strips are a game-changer for keeping small metal items and accessories neatly organized and easily accessible in your pantry. Say goodbye to cluttered drawers and lost bottle openers—this simple solution transforms your space into a sleek, functional area that saves time and reduces stress.
Imagine a thin, stainless steel magnetic strip mounted on the inside of a pantry door or along a side wall, with shiny metallic utensils, bottle openers, and small gadgets effortlessly sticking to it. The strip’s modern, minimalist design blends seamlessly with a neutral or bold color backdrop—think matte black or brushed silver—that highlights the metallic shine.
Nearby, textured ceramic jars in warm earthy tones add contrast, while a soft ambient light reflects off the metal surfaces, creating an inviting, organized feel. The overall look is clean, streamlined, and visually appealing, making your pantry feel more spacious and thoughtfully curated.
Getting started is easier than you think! All you need is a magnetic strip, which can be found at hardware stores or online, along with mounting screws or adhesive strips for easy installation. Attach the strip to an available wall or door panel in your pantry—most strips come with simple instructions.
For a more decorative touch, consider pairing it with a small, stylish tray or ceramic dish to hold items that aren’t magnetic but still need organizing. This quick upgrade turns a cluttered corner into a chic, efficient storage spot that’ll keep your small metal items in plain sight and within arm’s reach.
11. Incorporate Stylish Pantry Doors with Built-In Storage Compartments
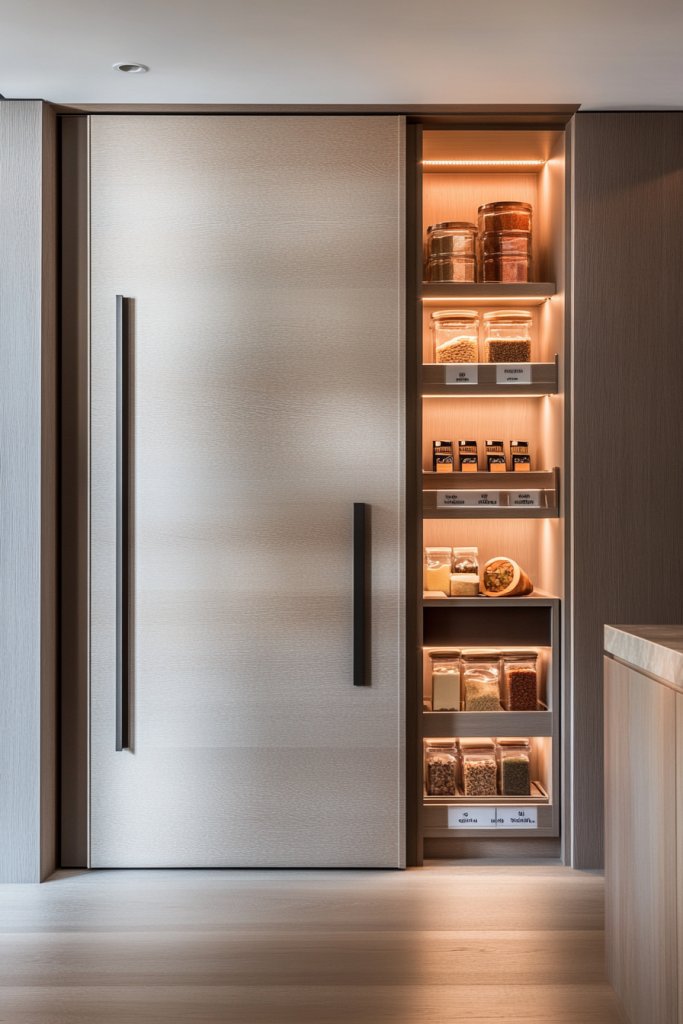
Transforming a plain pantry door into a functional and attractive feature can dramatically improve your kitchen’s organization. Stylish doors with built-in storage compartments not only hide clutter but also add a charming design element, making your pantry a seamless part of your kitchen decor.
Imagine a sleek, matte-black door with small, woven baskets or clear acrylic pockets embedded within, perfect for storing spices, small jars, or recipe cards. These doors often feature a combination of open and closed storage, offering both accessibility and concealment, while their aesthetic appeal enhances the overall look of your space.
Visually, these doors often blend modern minimalism with rustic charm. They might showcase a smooth surface with decorative cutouts or paneling, painted in soft neutrals like blush pink, creamy white, or deep navy.
The built-in compartments can be framed with contrasting trims, adding texture and depth. When open, the interior reveals a tidy arrangement of labeled containers, measuring spoons, or small pantry essentials, all arranged neatly within easy reach.
The tactile sensation of a matte finish combined with the visual warmth of natural wood or decorative metal accents creates a welcoming, organized vibe that invites you to experiment and customize. To implement this idea, start by selecting a sturdy pantry door that fits your space—consider replacing an existing door or installing a new one.
Choose storage compartments such as woven baskets, clear acrylic pockets, or small shelving units that can be securely mounted or inserted into cutouts. Use measuring tape to plan the placement of compartments, and attach them with screws or adhesive strips suitable for your door material.
Finish with a fresh coat of paint or a decorative wallpaper to match your kitchen’s style. Keep it simple by choosing ready-made storage solutions, or customize with DIY fabric or wood panels for a personal touch.
12. Add Drawer Organizers for Small Packets, Spices, and Snacks
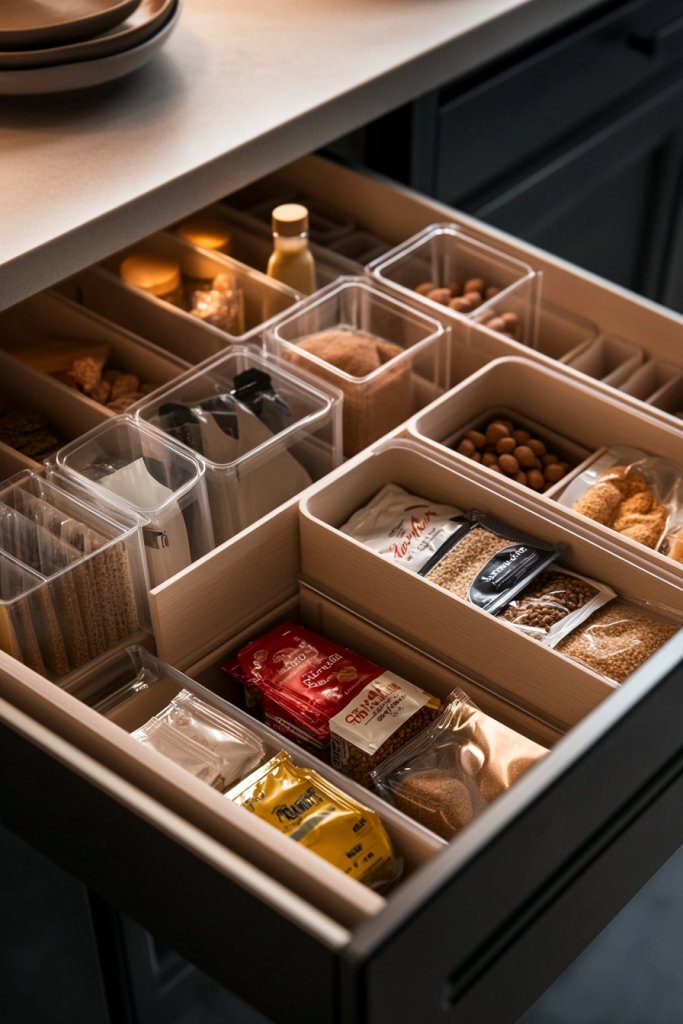
Keeping tiny packets, spices, and snack items tidy is a common challenge in pantry organization, and drawer organizers provide an elegant solution. These versatile inserts help prevent clutter and make it easier to find what you need quickly.
Picture a set of compartmentalized plastic or bamboo trays sitting inside a deep drawer, each section perfectly sized for spice packets, tea bags, or snack bars. The clean lines and neutral tones of these organizers create a streamlined look, transforming chaos into calm while giving your pantry a polished appearance.
Visually, these organizers are sleek and functional. They come in various sizes, from small, modular cubes to larger trays with adjustable dividers.
The materials—bamboo, clear acrylic, or durable plastic—are tactilely pleasing and easy to clean. Arrange them neatly, grouping similar items together: all spice packets in one section, snack bars in another, and small packets of seasoning or tea in a third.
The compartments encourage a tactile, sensory experience that makes restocking and choosing items a satisfying routine. The overall effect is a bright, inviting space where everything has its place, and clutter is minimized.
To set up, measure your drawer dimensions and select organizers that fit snugly without crowding. You can find pre-made drawer inserts at home stores or craft your own with cardboard, wood, or repurposed containers for a budget-friendly option.
Start by emptying the drawer, then clean and dry it thoroughly. Arrange the organizers inside, grouping similar items.
Fill each compartment with your small packets, spices, or snacks, and label the sections if needed with chalkboard tape or adhesive labels. This simple upgrade makes daily routines more efficient and visually satisfying.
13. Use Color-Coded Containers to Differentiate Food Categories Visually
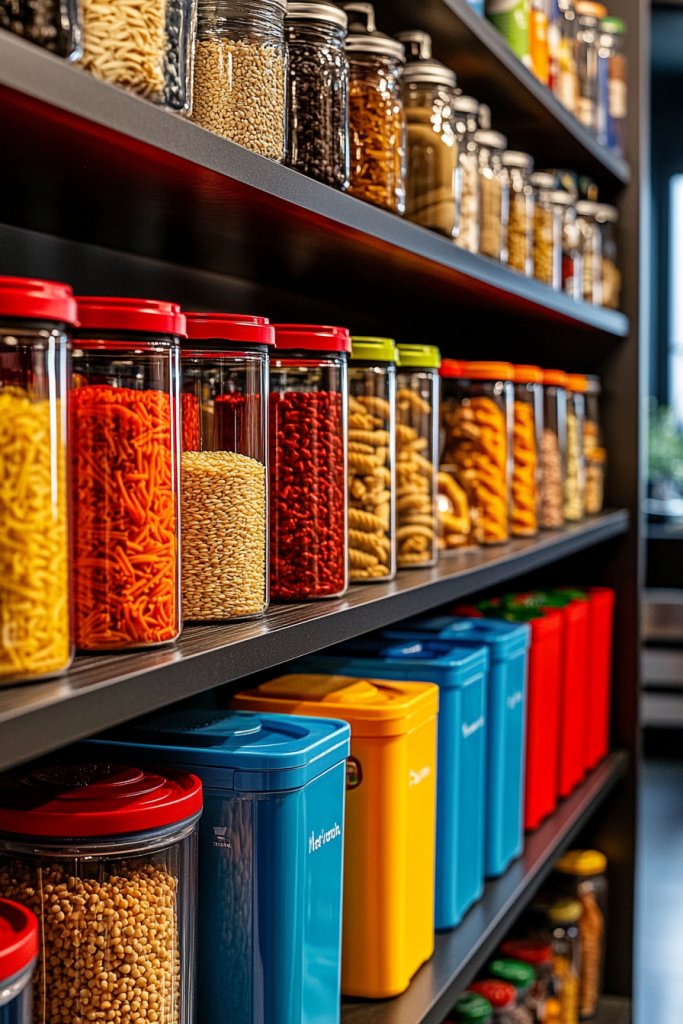
Color-coding your pantry containers is an eye-catching way to organize items while adding a cheerful pop of color to your space. Assigning specific colors to different food categories—such as red for grains, green for dried herbs, yellow for snacks—creates an intuitive system that simplifies shopping and retrieval.
Imagine a series of matching, airtight containers in vibrant hues neatly arranged on shelves, instantly letting you identify categories at a glance. This method also adds a playful yet organized aesthetic that can lift the overall look of your pantry.
Visually, color-coded containers come in a variety of styles, from sleek glass jars with colored silicone lids to stackable plastic bins in bold shades. The colors can be coordinated with labels or kept as pure, vibrant blocks of hue, depending on your style preference.
The containers themselves may feature textured or matte finishes, complementing other textured elements like woven baskets or ceramic jars. When arranged, the colorful containers create a cohesive visual flow that’s both functional and visually stimulating, making your pantry feel lively and inviting.
To implement, start by selecting a palette of 3-5 colors that suit your decor—consider pastel shades for a soft look or bright primary colors for a more energetic vibe. Purchase or repurpose containers in these colors, ensuring they are airtight and food-safe.
Fill each with specific food categories, like rice, pasta, or snacks, and attach clear labels with matching color accents for added clarity. Keep the system consistent, and periodically review to replace worn containers or update your color scheme. This vibrant approach not only streamlines your storage but also injects personality into your kitchen.
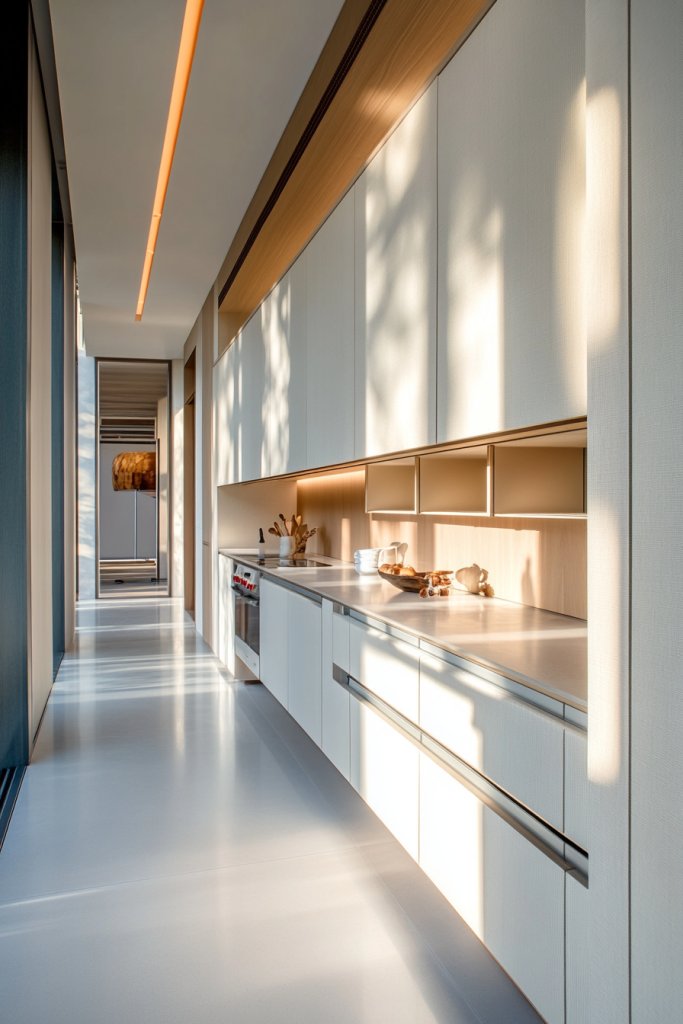
14. Install Slim, Vertical Storage Cabinets for Narrow Spaces
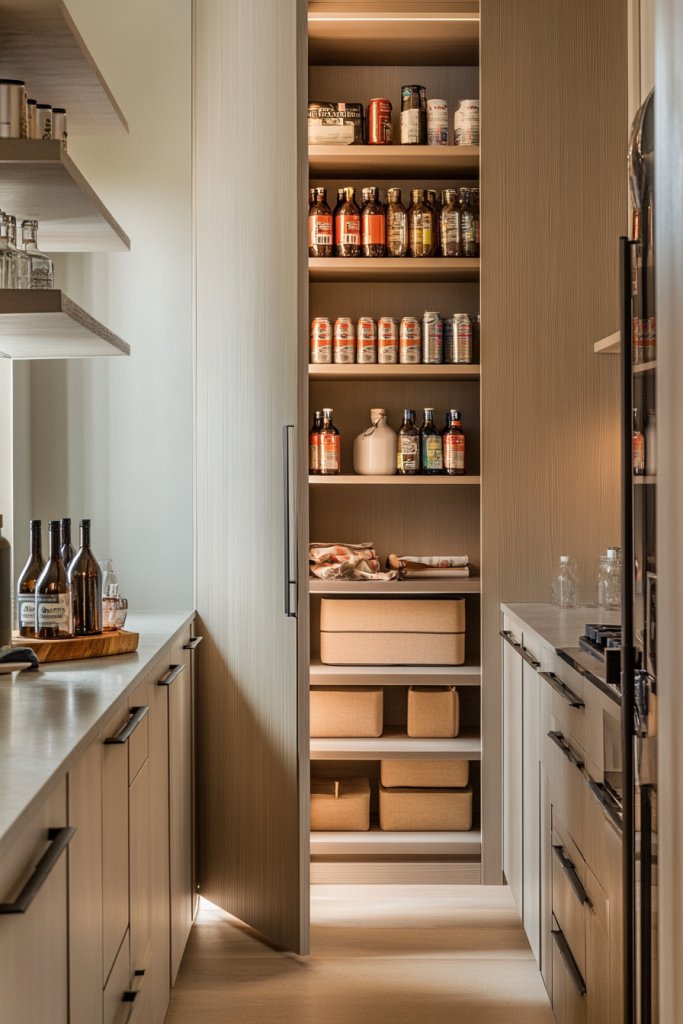
Maximize every inch of your pantry with slim, vertical storage cabinets designed specifically for narrow or awkward spaces. These tall, slender units are perfect for storing items you might otherwise overlook, such as baking sheets, spices, or canned goods.
Visualize a sleek, matte black cabinet that fits snugly into an unused corner, with multiple shelves reaching from floor to ceiling, adding height and depth to your storage options. This vertical solution maintains a clean, uncluttered look while providing ample space for organized stacking and shelving.
In appearance, these cabinets are often minimalist with flat doors, simple handles, and adjustable shelves. They can be finished in neutral tones like white, gray, or black to blend seamlessly with your existing cabinetry or painted in bold hues for a statement piece.
Inside, the shelves are typically lined with non-slip mats or decorative liners that add texture and prevent items from sliding. The overall aesthetic is modern and streamlined, making your narrow space into a functional focal point that enhances your pantry’s overall organization and style.
To implement, measure your narrow space carefully and select a slim cabinet that fits your dimensions. Choose a model with adjustable or removable shelves for customization.
Assemble the unit following the manufacturer’s instructions, then secure it to the wall for safety. Organize items by category—stack cans, arrange spices in small jars, or store baking supplies vertically—using bins or baskets if needed. With a little effort, this vertical cabinet transforms wasted space into a sleek, highly functional storage solution that keeps your pantry neat and accessible.
15. Incorporate Decorative Ceramic Jars and Canisters for a Vintage Vibe

Adding decorative ceramic jars and canisters to your pantry instantly infuses a vintage charm and elevates the aesthetic appeal of your storage. Think of beautifully glazed jars with intricate patterns or soft pastel tones, arranged on open shelves or atop countertops, holding dry goods like flour, sugar, or coffee.
These visually appealing containers create a warm, inviting atmosphere while offering practical storage that’s easy to access. Their timeless appeal complements rustic, farmhouse, or eclectic kitchen styles, making your pantry feel curated and cozy.
Visually, these ceramic jars feature a mix of soft textures and elegant details—embossed patterns, floral motifs, or antique-inspired labels. They come in a variety of sizes, from small spice jars to larger canisters suitable for bulk ingredients.
The glazed finish adds a subtle sheen, reflecting light and bringing a sense of craftsmanship to your space. Arranged together, they form a charming display that balances functionality with decorative appeal, especially when paired with vintage spoons or wooden scoops.
The overall effect is nostalgic and warm, creating a focal point that invites you to enjoy your pantry space. To incorporate, select a set of ceramic jars with airtight seals and decorative designs that match your kitchen decor.
Place them on open shelves, atop a wooden countertop, or inside glass-front cabinets for visual interest. Fill them with staples like rice, pasta, or coffee beans, and label them with chalkboard labels or vintage-style tags for easy identification.
For a cohesive look, mix and match sizes but maintain a consistent color palette or pattern. These charming containers not only organize your pantry but also serve as beautiful accents that enhance your overall kitchen ambiance.
16. Use Overhead Ceiling Racks for Bulk Items and Large Baskets
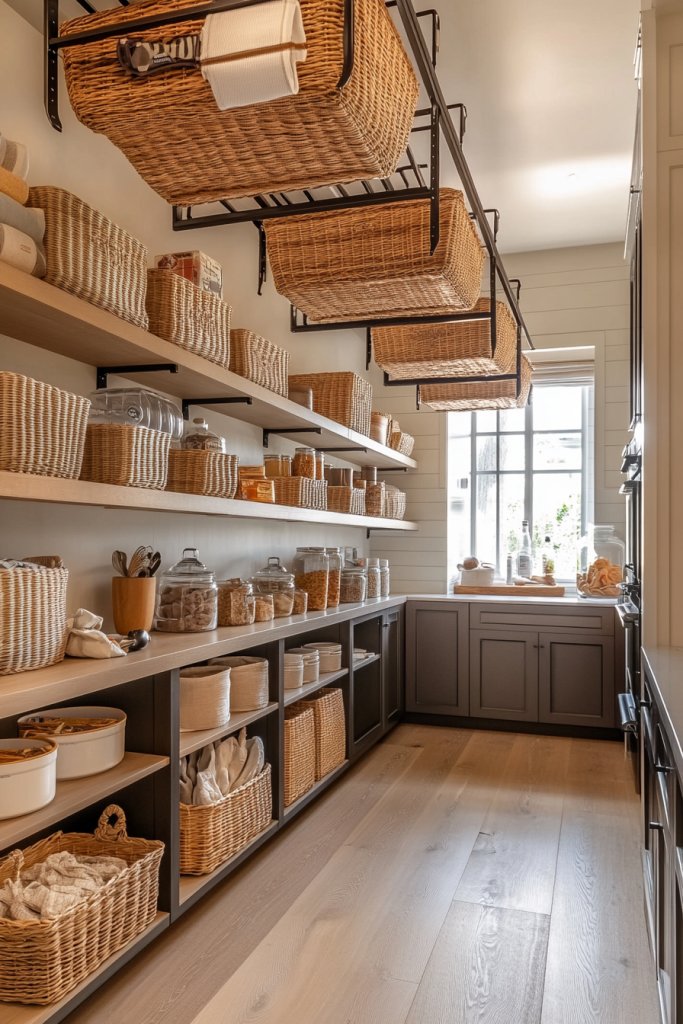
Maximize your pantry space by installing overhead ceiling racks, a game-changer for storing large or seldom-used items. This clever solution keeps bulky supplies off shelves, freeing up valuable space and reducing clutter.
It’s especially useful for storing large baskets filled with seasonal or bulk purchases, making your pantry look neat and organized. Imagine a sturdy metal or wooden rack suspended from the ceiling with adjustable hooks, positioned above your main shelving area.
It’s perfect for stacking large woven baskets or crates that hold oversized bottles, bulk boxes, or extra paper towels. The racks add an industrial-chic vibe, with neutral tones like matte black or distressed wood blending seamlessly into various decor styles.
The space beneath remains open and accessible, and the hanging baskets can be easily pulled down when needed, making the entire setup highly functional. The visual effect is airy and streamlined, with the bulk items neatly contained overhead.
To implement this idea, start by measuring your ceiling height and determining the ideal placement for the rack. Choose a durable, rust-resistant material such as metal or wood, and ensure it can support the weight of your intended items.
Use sturdy hooks or chains to suspend the rack securely, following the manufacturer’s weight guidelines. Hang your large baskets or bins—woven, plastic, or fabric-lined—and organize your bulk supplies inside.
Remember to keep the hanging items balanced and within reach, so you can access them without difficulty. With minimal tools and a little DIY effort, you’ll create an efficient overhead storage solution that keeps your pantry clutter-free and visually appealing.
17. Add a Chalkboard or Label Board for Customizable Storage Labels
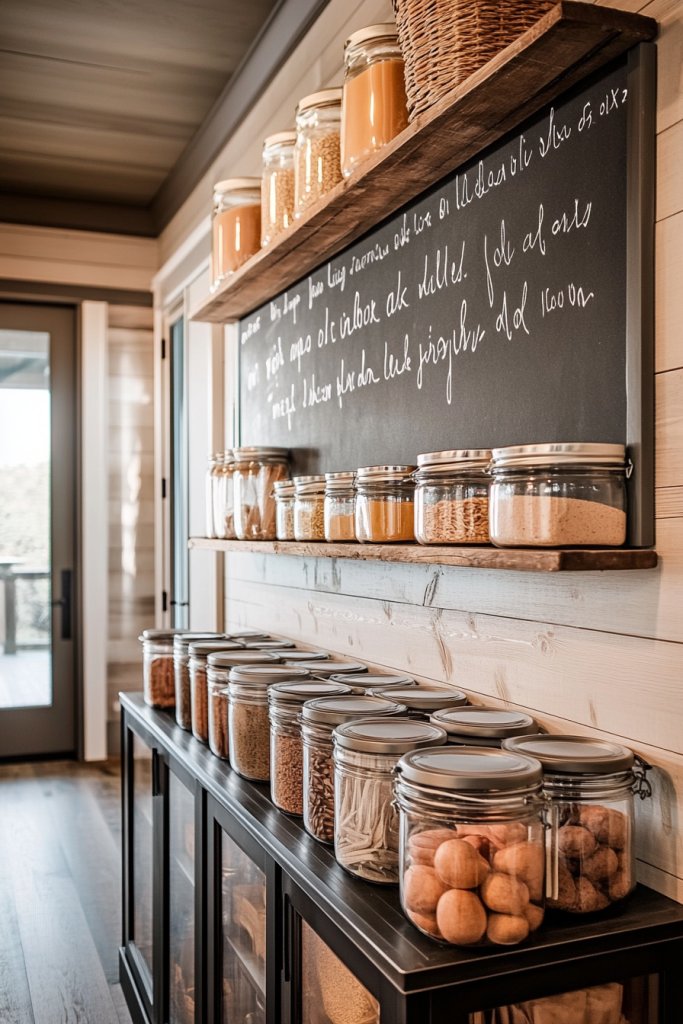
Transform your pantry into a perfectly organized space with a chalkboard or label board that allows for easy, customizable labeling. This idea not only keeps everything visually tidy but also makes it simple to update or change labels as your storage needs evolve.
It’s a practical and charming way to add a personal touch to your pantry organization. Picture a sleek chalkboard panel or a framed whiteboard mounted on the pantry door or wall.
You can write on it with chalk or dry-erase markers, labeling sections like “Snacks,” “Canned Goods,” or “Baking Supplies” with clear, bold handwriting. The surface can be decorated with colorful chalk or markers for a fun, playful look, or kept minimalist with simple white writing.
It instantly adds character to the space and provides a dedicated spot for notes, shopping lists, or reminders. The contrast of the black or white board against the shelves creates a modern, organized aesthetic, making it easier to locate items at a glance.
Getting started is straightforward: purchase a chalkboard or whiteboard panel that fits your space—either a peel-and-stick type or a framed piece. Use chalk or dry-erase markers to write labels, and consider adding colorful magnets or decorative clips for additional flair.
Mount the board securely on your pantry door or wall using screws or adhesive strips, depending on the surface. For a polished look, you can also create custom labels on adhesive label stickers and stick them directly onto containers, but the chalkboard offers the flexibility of quick updates and a charming, rustic vibe. With a little time and creativity, your pantry becomes effortlessly organized and visually engaging.
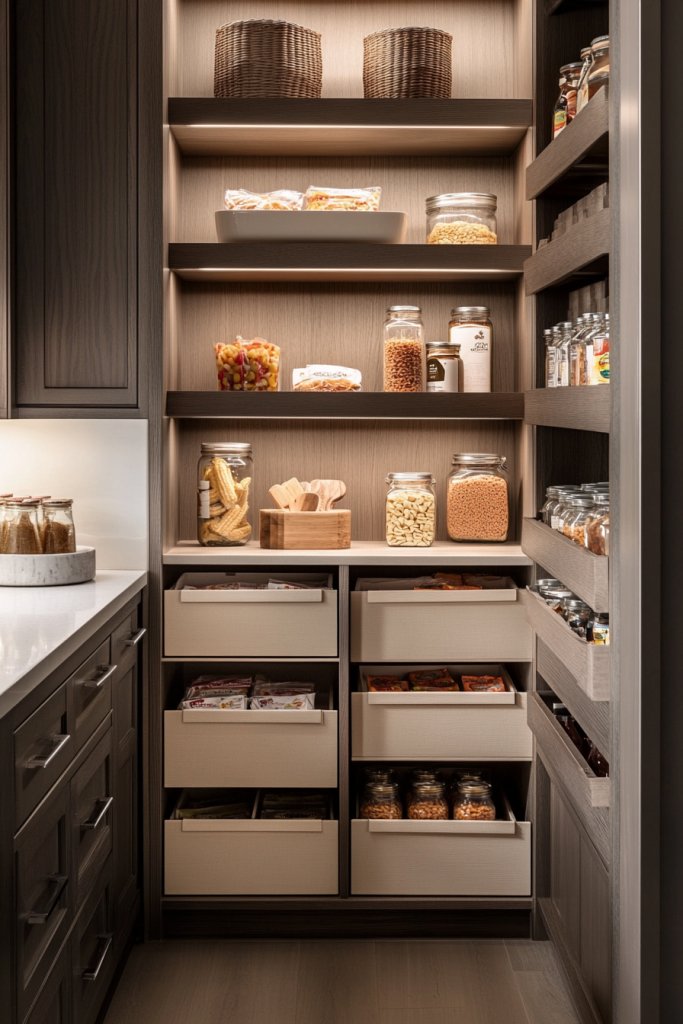
18. Incorporate Pull-Out Pantry Shelves for Effortless Access to Food Items
Add convenience and efficiency to your pantry by installing pull-out shelves, making it easy to reach items stored deep inside. These shelves turn traditional storage into accessible, user-friendly solutions—perfect for busy households or those with limited mobility.
They help prevent forgotten items at the back of shelves, reducing waste and making meal prep smoother. Envision sleek, sturdy metal or wood pull-out shelves mounted on sliding tracks within your existing cabinetry or custom pantry space.
When extended, they reveal the entire shelf surface, allowing you to see and access everything at once. These can be organized with bins or baskets for different categories such as snacks, spices, or canned goods, creating a tidy, organized look.
The design is modern and clean, with smooth gliding mechanisms that operate quietly. The shelves also come in various widths and heights, fitting narrow or wide spaces, and can be customized to suit your storage needs.
The overall effect is a clutter-free, streamlined pantry where everything is within easy reach. To install pull-out shelves, start by measuring your cabinet or pantry interior and selecting a kit compatible with your space—many are available with adjustable features.
Attach the slides to the sides of your cabinet, then fix the shelves onto the slides, following the manufacturer’s instructions. Use screwdriver and level tools for precise installation.
Once installed, organize your food items in baskets or bins for quick access. This upgrade is a practical, straightforward project that transforms your pantry into a more functional and enjoyable space to cook and store.
19. Use Stylish Textile Liners for Baskets and Containers to Enhance Decor
Elevate your pantry’s look by lining baskets and containers with beautiful textiles that add warmth, texture, and personality. Stylish fabric liners not only protect your containers but also create a cohesive, curated aesthetic, turning functional storage into decorative accents.
It’s an easy way to introduce color, pattern, and softness to your organized space. Imagine soft linen or cotton fabrics with subtle patterns—such as stripes, florals, or geometric designs—drilled with eyelets or sewn into custom shapes.
These liners drape elegantly over baskets or fit snugly inside containers, creating a polished, intentional look. Choose materials in neutral tones like beige, blush, or slate gray for a minimalist vibe, or go bold with vibrant colors and prints for a playful touch.
The tactile quality of textiles adds a cozy, inviting feel to your pantry, making it a space you enjoy spending time in. Plus, removable liners are easy to wash and switch out seasonally or for holidays, keeping your decor fresh and adaptable.
To implement this idea, select appropriate fabrics—cotton, linen, or washable textiles—and measure your baskets or containers carefully. Sew or purchase pre-made liners that fit your items snugly.
Use button, snap, or drawstring closures for secure fitting, and consider adding decorative trims or piping for extra detail. Simply slide the liners into your baskets or containers, then fill with your pantry essentials. With a little sewing or creative shopping, you’ll add a stylish, personalized touch that makes your pantry both practical and beautiful.
20. Incorporate a Modular Storage System for Flexibility and Expansion
A modular storage system brings adaptable, customizable organization to your pantry, allowing you to expand or reconfigure your space as your needs change. These systems consist of interlocking units, stackable shelves, and versatile containers that can be arranged to fit any space, big or small.
They’re perfect for creating a tailored solution that grows with your household. Visualize a sleek set of stackable boxes, pull-out trays, and adjustable dividers that can be combined in various configurations.
They come in neutral tones like white, gray, or natural wood, blending seamlessly into modern or rustic decor. The modular units organize food by category—baking supplies, snacks, canned goods—while maintaining a clean, cohesive look.
The flexibility means you can add more modules over time or rearrange as your storage needs evolve, avoiding costly renovations or cluttered shelves. This system transforms your pantry into a neat, expandable storage haven tailored specifically to your lifestyle.
To set up a modular storage system, start by assessing your available space and choosing a set of interlocking or stacking units that fit your dimensions. Look for containers with labels, adjustable dividers, or collapsible features for maximum versatility.
Arrange your items in these modules, grouping similar foods together, and add small baskets or trays for smaller items. The key is to plan your organization in zones, then expand or reconfigure modules as needed, making your pantry adaptable, efficient, and visually harmonious. It’s an investment in a smarter, more flexible storage solution that evolves with your household.
21. Install Hidden Compartments or Sliding Panels for Clutter-Free Surfaces
Creating hidden compartments or sliding panels is an innovative way to keep your pantry surfaces clean and organized, hiding away less-used items or clutter. This concept transforms your space into a sleek, minimalist haven by concealing storage behind discreet panels that blend seamlessly with your cabinetry or wall.
It’s especially useful for maintaining a tidy look in small kitchens or for hiding appliances and bulky items that tend to clutter counters. Imagine a smooth, matte-finished panel that slides open to reveal a small hidden shelf or compartment behind it.
The panel could be flush with the rest of your cabinetry, painted in a neutral tone like soft gray or creamy white to match your kitchen’s decor. When closed, the surface appears entirely smooth and clutter-free, with just a subtle handle or finger groove for easy access.
The space behind might hold spices, small utensils, or cleaning supplies, cleverly tucked away but easily reachable. To implement this, start by measuring the area where you want the hidden compartment.
Choose a sturdy, lightweight material like MDF or plywood, and paint or veneer it to match your existing cabinetry. Use a sliding door mechanism or a push-to-open latch for a seamless look.
Install the panel flush with the surface using a mounting track or hinges. For beginners, DIY kits are available, and simple tutorials online can guide you through the process, making this an achievable upgrade to elevate your pantry’s functionality and aesthetics.
22. Use Decorative Trays to Organize and Display Frequently Used Items
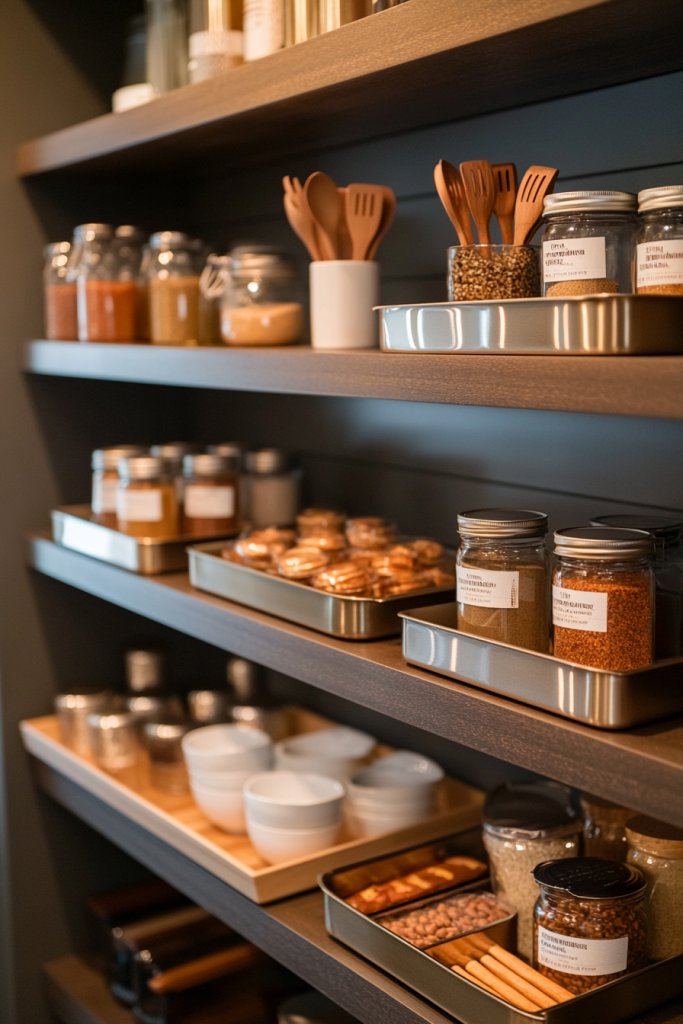
Decorative trays are a stylish yet functional way to organize your everyday essentials and bring a touch of elegance to your pantry. They serve as designated spots for items like spice jars, cooking oils, or snack packs, keeping them grouped neatly and making them easy to grab when needed.
Plus, a well-chosen tray adds texture and visual interest, turning practical storage into a decorative feature. Picture a vintage-inspired brass-trimmed tray with a soft matte surface, holding a collection of glass spice jars filled with colorful herbs and spices.
Or perhaps a sleek black marble tray that displays bottles of olive oil, balsamic vinegar, and a small potted herb. The textures of the materials—smooth marble, textured ceramics, or shiny metals—contrast beautifully with the surrounding shelves.
These trays can be layered or stacked, creating a sense of order and sophistication while making your frequently used items instantly accessible. To implement, select trays that complement your kitchen’s style—think rustic wood, elegant ceramic, or modern acrylic.
Use them to corral small items like sugar packets, tea infusers, or baking supplies. Place them on open shelves or inside cabinets for a tidy look.
For easy maintenance, choose materials that are durable and easy to clean, and consider adding small decorative objects like a vintage spoon or a small vase to enhance visual appeal. Basic tray sets are widely available online or at home goods stores, making this an easy and impactful upgrade.
23. Add a Small Tiered Stand for Breakfast Items and Snacks
A small tiered stand is a charming and practical addition to your pantry for organizing breakfast items, snacks, or even baking supplies. Its multi-level design maximizes vertical space and creates an eye-catching display that adds a cozy, inviting vibe to your storage.
Perfect for quick access to cereal boxes, granola, or snack bars, it also helps keep your counters or shelves tidy. Visualize a delicate, vintage-style metal stand with three or four tiers, each lined with a soft cotton or linen liner.
On the top tier, you might place a jar of granola or a small bowl of fresh fruit; the middle tier could hold cereal boxes or snack packs, while the bottom might feature larger items like loaves of bread or bulk-pack snacks. The stand’s open design allows you to see everything at a glance, with a light, airy feel that makes your pantry look cheerful and organized.
Bright, cheerful colors like pastel pinks, mint greens, or classic whites work well to create a welcoming atmosphere. To set this up, choose a sturdy, lightweight metal or wood stand that fits your space.
Arrange your frequently used breakfast or snack items on the tiers, using small baskets or bowls for added organization. Place the stand on a countertop or inside a cabinet for easy access.
For a simple DIY project, you can repurpose a cupcake stand or small cake tier, painting or decorating it to match your kitchen decor. This versatile piece makes daily routines more enjoyable and adds a decorative touch to your pantry.
24. Incorporate Modern, Minimalist Containers for a Sleek, Cohesive Look
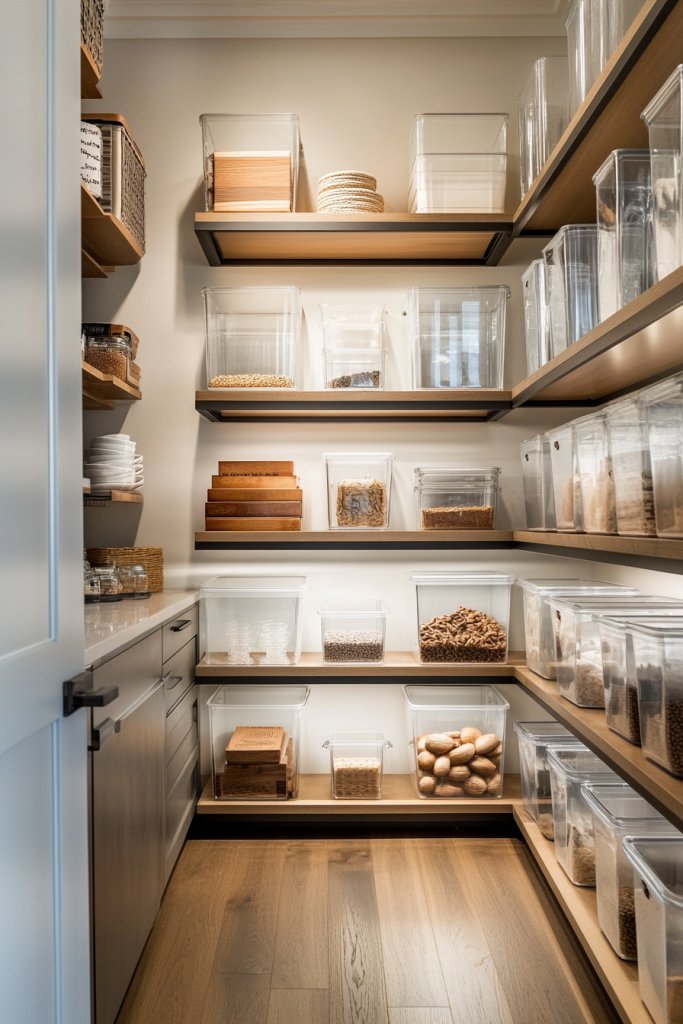
Using modern, minimalist containers is a surefire way to create a sleek, cohesive pantry that looks organized and contemporary. These containers—made of clear acrylic, matte silicone, or stainless steel—offer a uniform appearance, making it easy to see contents at a glance and reducing visual clutter.
Their simple, clean lines elevate your pantry’s aesthetic, making it feel orderly and inviting. Picture uniform, rectangular acrylic containers with snap-on lids, filled with pasta, rice, or baking supplies.
The transparent material allows you to quickly identify contents, while the neutral tones—like frosted white or matte black—blend seamlessly into a modern kitchen. Alternatively, stainless steel canisters with minimalist engraved labels add a touch of sophistication, especially when paired with matching lids.
These containers not only look elegant but also keep food fresh and protected from moisture and pests. To implement, select a set of containers in matching sizes and neutral colors.
Transfer your pantry staples into these for a uniform look, labeling them with simple, modern fonts or embossed text. Place them on open shelves or inside cabinets, grouping similar items together.
For budget-friendly options, consider purchasing online or at home goods stores, or repurposing jars and containers you already have. This approach simplifies your storage while giving your pantry a modern, polished appearance that’s both functional and stylish.
25. Use Colorful or Patterned Labels to Add Fun and Functionality to Storage
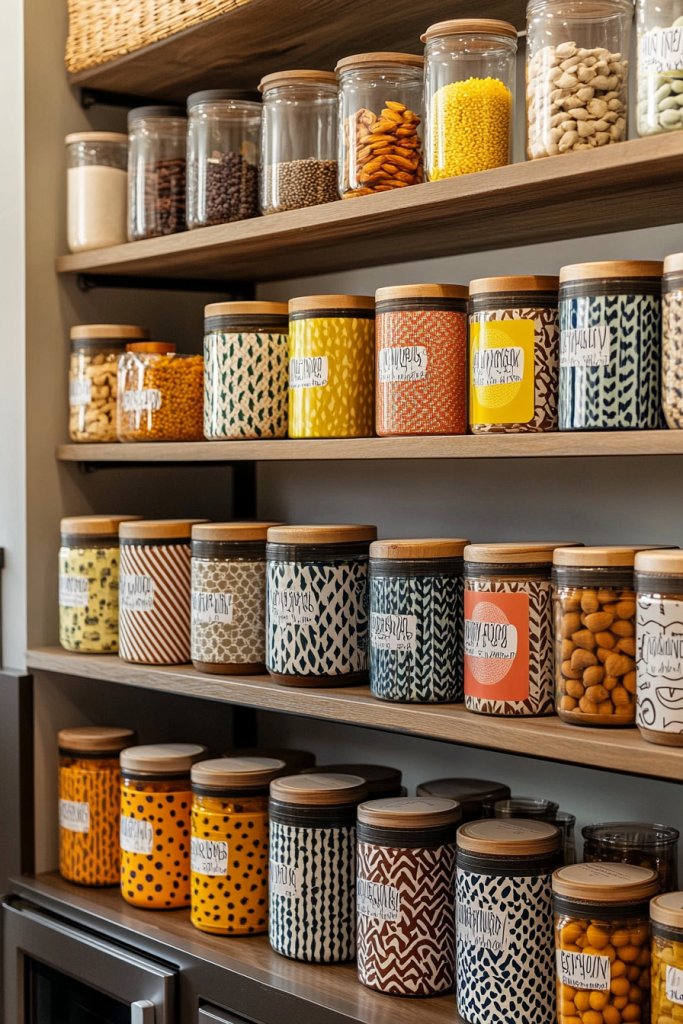
Adding colorful or patterned labels is a simple yet impactful way to make your pantry visually engaging while boosting functionality. Bright, playful labels can help you quickly identify contents, reduce clutter, and add a personal touch to your storage.
Whether you choose bold colors, whimsical patterns, or elegant fonts, labels turn ordinary storage jars and containers into charming organizational accents. Imagine a set of glass jars with vibrant, hand-painted labels—perhaps in cheerful yellow, sky blue, or soft pink—detailing ingredients like “Quinoa,” “Oats,” or “Cocoa Powder.” Or consider patterned chalkboard labels with decorative borders that you can write on with chalk or chalk markers, allowing for easy updates.
The contrast of colors and patterns against neutral containers creates a lively, inviting look that complements your overall decor. These labels also help family members quickly find what they need, simplifying meal prep and snack time.
To create or purchase, choose durable labels made from waterproof paper or vinyl that resist moisture. Use a label maker, paint pens, or printable sticker sheets to customize your labels with fun fonts and colors.
Apply them to your jars, baskets, or containers, ensuring they’re securely attached and easy to read. For a cohesive look, stick to a color palette or theme that matches your kitchen’s style. This small step adds a burst of personality and organization to your pantry, making everyday routines more enjoyable.
Conclusion
With a variety of smart solutions like clear storage bins, adjustable shelving, label organization, and decorative touches, transforming your pantry into a streamlined, functional space is entirely achievable. These ideas inspire you to maximize every inch, add personal style, and create an organized environment that makes cooking and storage effortless.
Don’t hesitate to experiment and tailor these tips to fit your unique needs—your perfect pantry is within reach. Start today and enjoy the satisfaction of a beautifully organized kitchen that works as hard as you do!
Leave a Reply