Imagine transforming your ordinary bedroom into a personal cinema where movie nights feel larger-than-life. Projector in bedroom ideas have surged in popularity because they effortlessly turn any space into a cozy, immersive entertainment zone—perfect for relaxing solo or sharing special moments with loved ones. With the right setup, your bedroom can become a stylish retreat that combines comfort with cinematic magic, all without the hefty price tag of traditional home theaters.
In this article, you’ll discover a variety of creative projector ideas to elevate your bedroom experience—from sleek wall projections to cozy outdoor movie corners. Whether you’re after a minimalist vibe, a fun themed space, or a full-blown home theater, there’s something here for every style and space. Get ready to unlock your bedroom’s potential and bring your movie nights to life like never before!
1. Create a Cozy Movie Wall with Projected Artful Scenes

Ever wish your bedroom felt more like a personal cinema without the hefty price tag? Transforming a plain wall into a captivating visual display can turn your space into a relaxing retreat. It’s all about creating an ambiance that invites unwinding and escapism. If your current setup feels dull or uninspired, this idea might be just what you need.
Picture a large, blank wall, suddenly alive with sweeping cinematic landscapes or abstract visuals that shift with your mood. Soft, ambient lighting enhances the projected scenes, making the space feel immersive. The visuals dance across the wall in rich colors and textures, giving your bedroom a dynamic, ever-changing backdrop. It’s like having a personal art gallery that moves.
You can customize the scenes to match your favorite genres or seasons—think snowy mountains in winter or lush forests in summer. For a minimalist look, choose subtle, monochrome projections that blend with your decor. Seasonal decor swaps, like cozy throws or textured wall panels, can complement the visuals for a cohesive vibe. For smaller rooms, opt for scaled-back visuals to avoid overwhelming the space.
Start with a good quality projector capable of sharp images and decent brightness. Mount it securely on the ceiling or a sturdy shelf for stability. Use a wrinkle-free white or light-colored sheet as your DIY screen, or paint a wall with special projector paint for a permanent solution. Connect your projector to a streaming device or computer loaded with visual content. Adjust the focus and keystone correction for perfect alignment. Use blackout curtains or shades to block outside light, ensuring vivid, crisp images.
Add texture around the projection area with soft textiles like a plush rug or layered curtains that don’t interfere with the visuals. Incorporate mood-enhancing elements such as scented candles or a diffuser to heighten relaxation. Change the visuals periodically to keep the experience fresh—nature scenes, cityscapes, or abstract art. Personalize with your favorite colors or themes for a truly unique cinematic experience.
This approach turns your bedroom into a personal theater that adapts to your style and mood. It’s an affordable way to elevate your space and impress friends when they visit. With just a little setup, you’ll enjoy nightly shows that make winding down something to look forward to. Ready to turn your wall into a living masterpiece?
2. Use String Lights and a Projector for a Dreamy Night Sky Effect
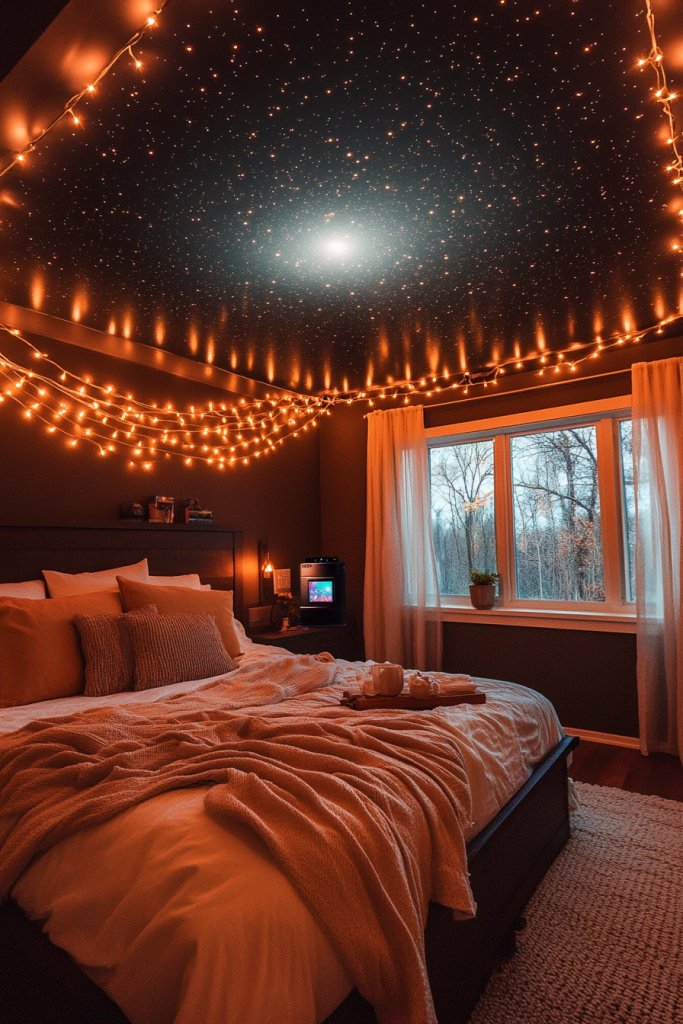
Ever dreamed of gazing at a starry night without leaving your bedroom? Combining string lights with a projector can mimic the vast, calming night sky right above your bed. It’s perfect for creating a tranquil, dreamy environment after a long day or when you just want to escape into a cosmic wonderland. If your current ceiling feels flat or uninspiring, this idea adds a touch of magic.
Imagine soft, twinkling lights framing your ceiling, while a projector casts shimmering star clusters or swirling galaxies overhead. The gentle glow of the string lights complements the cosmic visuals, enhancing the sense of depth and wonder. The combination produces a calming, immersive atmosphere that feels both expansive and cozy. You can almost hear the silence of space as you drift into sleep.
Choose warm white or cool-toned string lights depending on your mood—warm for cozy nights, cool for a more ethereal vibe. For seasonal variation, add fairy lights shaped like snowflakes or stars, which blend seamlessly with celestial projections. In smaller rooms, keep the lights minimal to avoid clutter, while larger spaces can handle more elaborate setups. You can also incorporate fiber optic strands for a more textured, star-like appearance.
Start with a projector capable of displaying star or space scenes; many are budget-friendly and easy to operate. Hang string lights across the ceiling or along the walls, positioning them to frame the projection area without interfering with the image. Use a ceiling mount for the projector or place it on a stable surface aimed at your chosen screen or wall. Dim the room lights or turn them off entirely for best visual effect. Set the projector to loop your favorite night sky videos or images.
Add a soft, textured blanket in celestial tones—deep blues, silvers, or midnight black—to reinforce the theme. Incorporate a few plush cushions with star or moon motifs for extra comfort. Change the projection themes seasonally—shooting stars in summer or snowflakes in winter—keeping your space lively and engaging. Personal touches like a small telescope or glow-in-the-dark decals can deepen the cosmic vibe.
This setup transforms your bedroom into a peaceful retreat that sparks your imagination and relaxation. It’s an easy, cost-effective way to add ambiance and make bedtime something you look forward to. Plus, it’s a fantastic conversation starter—who doesn’t love starry nights? Ready to turn your ceiling into a celestial sky?
3. Design a Minimalist Projector Screen Using a Tensioned White Sheet
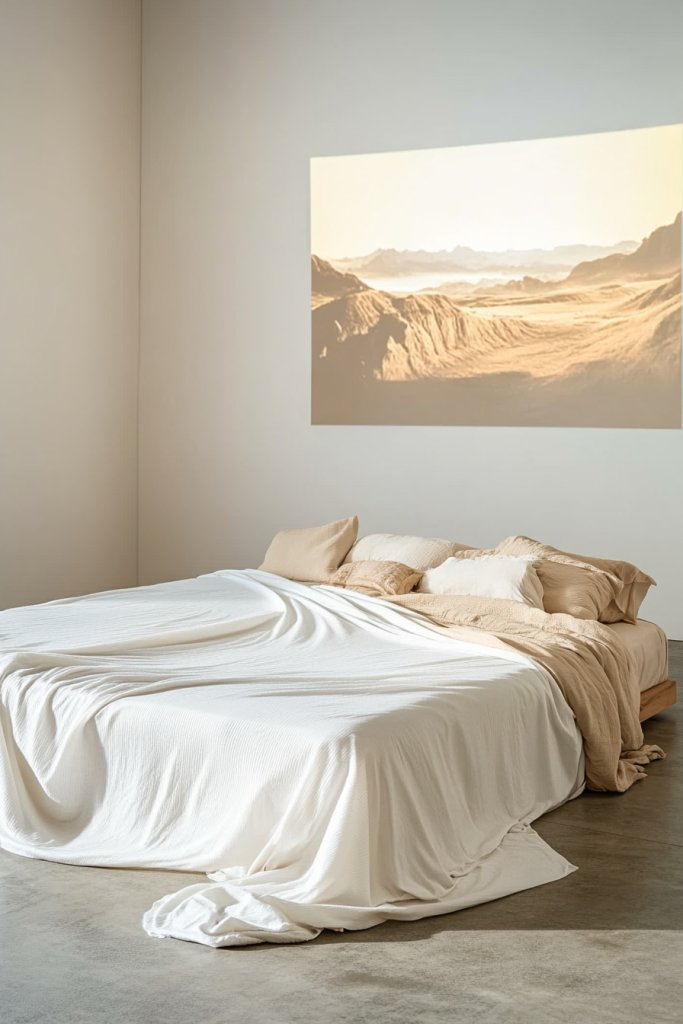
Tired of bulky, expensive screens cluttering your space? A simple tensioned white sheet can serve as a sleek, low-cost projector screen that blends into your minimalist decor. It’s a quick DIY project that transforms any wall or corner into a cinema-ready surface. If you crave clean lines and clutter-free walls, this idea hits the sweet spot.
Visualize a crisp, wrinkle-free white sheet stretched tightly across a wall or frame, creating a smooth surface for projection. The fabric’s matte finish prevents glare and enhances image clarity, making movies and visuals pop. When the projector is off, it simply looks like a clean, simple wall or a subtle textile element. During movie time, it becomes a dedicated cinematic canvas that doesn’t distract from your overall decor.
Opt for neutral-colored or textured fabrics that complement your style—think linen for a natural look or sleek polyester for modern minimalism. For seasonal variation, switch out the fabric for different textures or colors, like deep navy or charcoal. Mount the sheet with discreet hooks or tension rods, keeping everything tidy and unobtrusive. For a more permanent setup, consider painting a wall with projector-compatible paint.
Start by selecting a smooth, light-colored fabric that resists wrinkles. Mount a tension rod or secure hooks on the ceiling or wall edges to keep the sheet taut. Ensure the fabric is tight and wrinkle-free for the best image quality. Use a projector with keystone correction and focus adjustments to align the image perfectly. Test in different lighting conditions, and adjust curtains or blinds to improve contrast. Keep the fabric clean to maintain clarity.
Frame the fabric with minimalistic trim or sleek molding to add a finished look. Incorporate a hidden storage box for your remote or media devices nearby for convenience. For extra flair, you can add subtle lighting along the edges—think hidden LED strips—that won’t interfere with the projection. Change the fabric periodically for a fresh look or to match seasonal decor.
This no-fuss solution keeps your room looking sleek while providing a fully functional home theater. It’s perfect for renters or anyone who values simplicity and versatility. With a little effort, you turn a basic fabric into a high-performance cinematic surface. Ready to keep your space minimal and impactful?
4. Incorporate a Floating Bed Frame with Built-in Projector Space
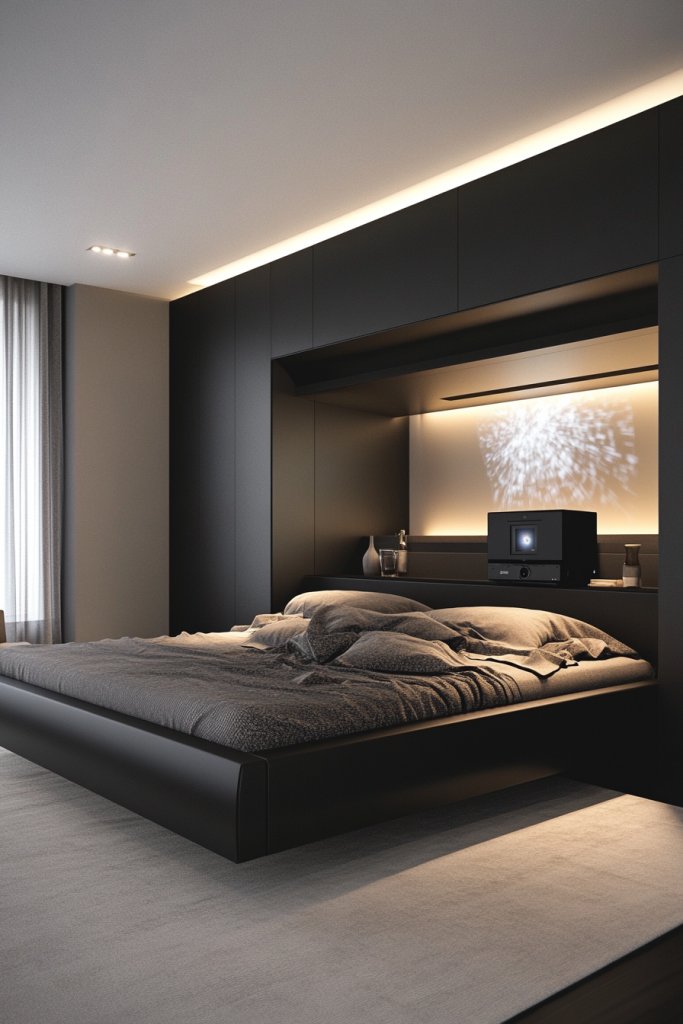
Ever wish your bed could do more than just provide a good night’s sleep? A floating bed frame with a dedicated projector nook combines style and function, turning your sleeping area into an entertainment hub. It’s perfect for those who love techy designs and want a seamless look. If your current setup feels uninspired or cluttered, this innovative idea might be your game-changer.
Imagine a sleek, modern bed floating just above the floor, with a recessed space at the foot or headboard designed specifically for a projector. Soft, indirect lighting highlights the clean lines, while the projector wall or screen becomes an integrated part of your sleep zone. The design creates a futuristic vibe, making your bedroom feel like a personal cinema suite. All your entertainment gear is neatly tucked away, maintaining a clutter-free aesthetic.
Choose a floating frame with customizable compartments—some with built-in shelves for media players or speakers. For a cozy feel, incorporate textured headboard panels or upholstered accents that match your decor. Adjust the projector placement based on room size; smaller rooms benefit from a ceiling mount, while larger spaces can handle a dedicated nook. Seasonal accessories like throw blankets or decorative cushions can soften the look.
Start with a sturdy, minimalist bed frame that supports a recessed space or shelf area. Use a low-profile projector designed for short-throw distances, or mount a projector on the ceiling aimed at a dedicated wall or screen. Install the projector space with proper ventilation and cable management to keep everything neat. Use hidden wiring channels to avoid clutter and ensure easy access for maintenance. Test the setup with different media sources and adjust the projector angle for optimal focus.
Add textured fabrics or upholstered panels around the projector nook for visual interest and sound absorption. Incorporate smart lighting controls for mood lighting that adjusts with your viewing preferences. Personalize the space with themed bedding or decorative accents that match your favorite movies or series. Keep the media devices organized in drawers or cabinets integrated into the bed frame.
This setup elevates your bedroom into a sleek, multifunctional sanctuary that combines rest and entertainment effortlessly. It’s a statement of modern design and smart living. With a little planning, your sleep zone becomes a private cinema that’s both stylish and functional. Ready to sleep and watch in style?
5. Enhance the Experience with Surround Sound and Subtle Lighting
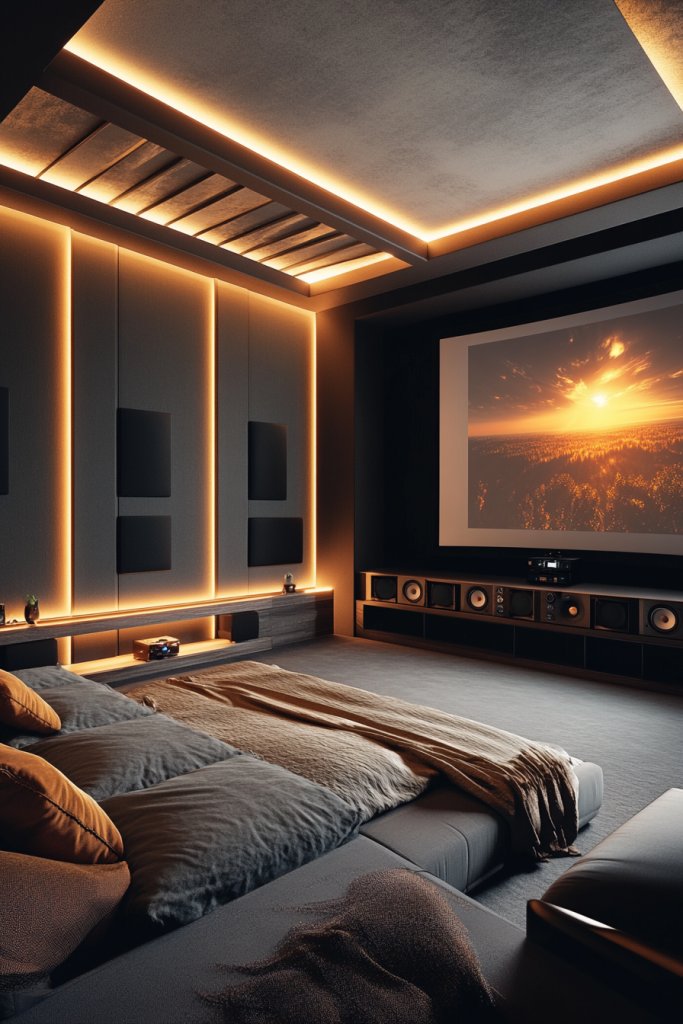
Watching movies with tinny sound or harsh lighting kills the vibe fast. Enhancing your setup with surround sound and subtle ambient lighting can make your bedroom feel like a real home theater. It’s about immersing yourself in the experience without needing a dedicated theater room. If you crave richer audio and softer lighting, this upgrade is a must.
Envision a system where your projector is complemented by wireless surround speakers placed strategically around the room. Soft, warm lighting strips or dimmable sconces create a cozy glow that doesn’t interfere with the image. The combination produces a theater-like atmosphere, with crystal-clear sound and gentle illumination that enhances your viewing pleasure. It’s sensory overload in the best way.
Opt for sleek, wireless speakers that blend with your decor—minimalist black or metallic finishes work well. Use LED strip lights behind furniture, along shelves, or around the ceiling perimeter for customizable mood lighting. For seasonal changes, switch to color-changing LED strips that sync with your content or mood. Keep lighting fixtures unobtrusive so they don’t distract from the screen.
Choose a high-quality wireless speaker system compatible with your projector or streaming device. Position the speakers at ear level around your seating area for optimal surround sound. Install LED strips with remote controls or app-based dimming features for easy adjustments. Test the setup with your favorite movies, adjusting speaker angles and light brightness for the best experience. Use sound calibration tools if available to fine-tune audio quality.
Coordinate lighting colors with your content—deep reds for action scenes, cool blues for calm moments. Consider adding a subwoofer for richer bass or soundbars for simplicity. Personalize the ambiance with a mix of soft textures, like plush cushions or textured throws that reflect the lighting mood. Keep remote controls handy for quick adjustments.
Upgrading your audio and lighting transforms your bedroom into an immersive entertainment space. It’s an easy way to elevate the viewing experience and impress friends during movie nights. With just a few tech upgrades, your space becomes a cozy, cinematic retreat. Ready to surround yourself with sound and subtle glow?
6. Create a Themed Movie Night Area With Cozy Seating and Textured Rugs
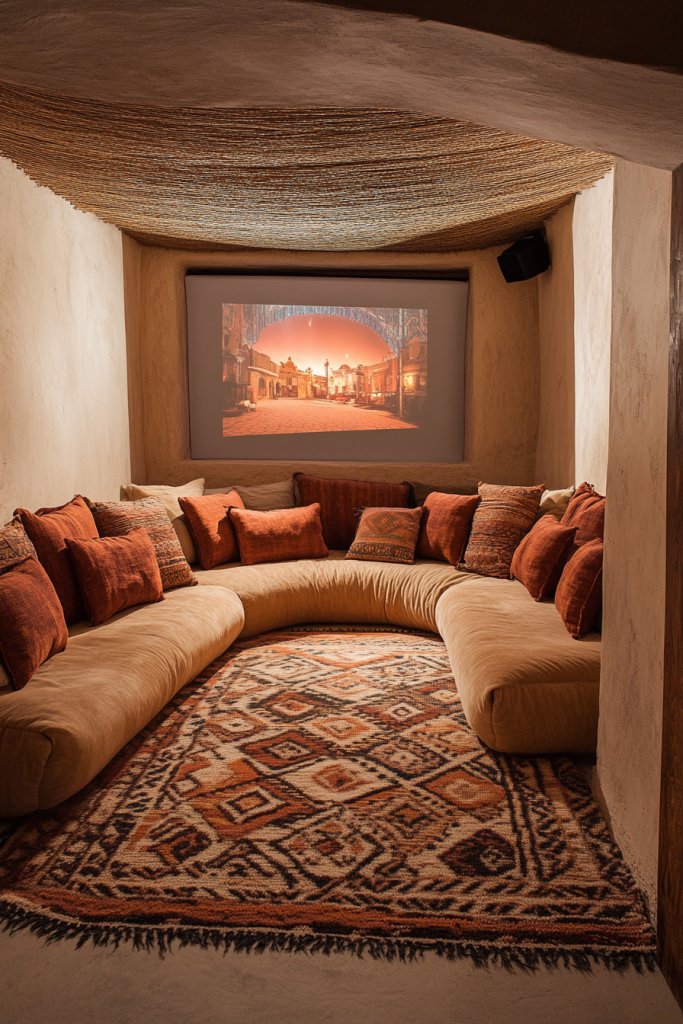
Bored with the same old movie routine? Creating a themed movie night area turns viewing into an event worth looking forward to. By adding cozy seating and textured rugs, you craft a comfortable, inviting space that feels like your personal cinema lounge. If your current setup feels uninspired or plain, this idea adds personality and fun.
Picture a nook with plush bean bags, soft cushions, and layered textured rugs that invite you to sink in. The projector casts movies onto a dedicated wall or screen, framed by themed decor—think vintage posters or movie-themed textiles. Ambient lighting softly illuminates the space, while the tactile textures of the textiles create a warm, cozy environment. It’s a perfect blend of comfort and cinematic magic.
Choose seating options based on your style—sleek leather recliners, colorful poufs, or even a vintage sofa. Textured rugs in bold patterns or neutral tones add depth, while themed throw pillows or blankets personalize the space. For seasonal updates, swap out cushions or add cozy throws in festive colors. Use modular furniture to adapt the space for different movie nights or gatherings.
Start with a dedicated corner or wall for your projector setup. Layer your floor with textured rugs that define the space and add comfort underfoot. Arrange seats for optimal viewing angles, ensuring everyone has a clear line of sight. Incorporate side tables or storage ottomans for snacks and accessories. Add soft, indirect lighting like battery-operated lanterns or string lights to enhance the ambiance. Keep everything accessible and clutter-free.
Incorporate themed decor—like vintage film reels or color-coordinated textiles—to reinforce your chosen motif. Use plush, tactile cushions and throws to increase comfort. Change the theme seasonally—beachy for summer, cozy cabin for winter—to keep things fresh. Personal touches like your favorite snacks stored nearby or custom playlists elevate the experience.
This dedicated space makes movie nights special and personal. It encourages friends and family to gather and unwind in style. With thoughtful touches, your cinematic corner becomes a cherished retreat. Ready to create your own cozy, themed movie haven?
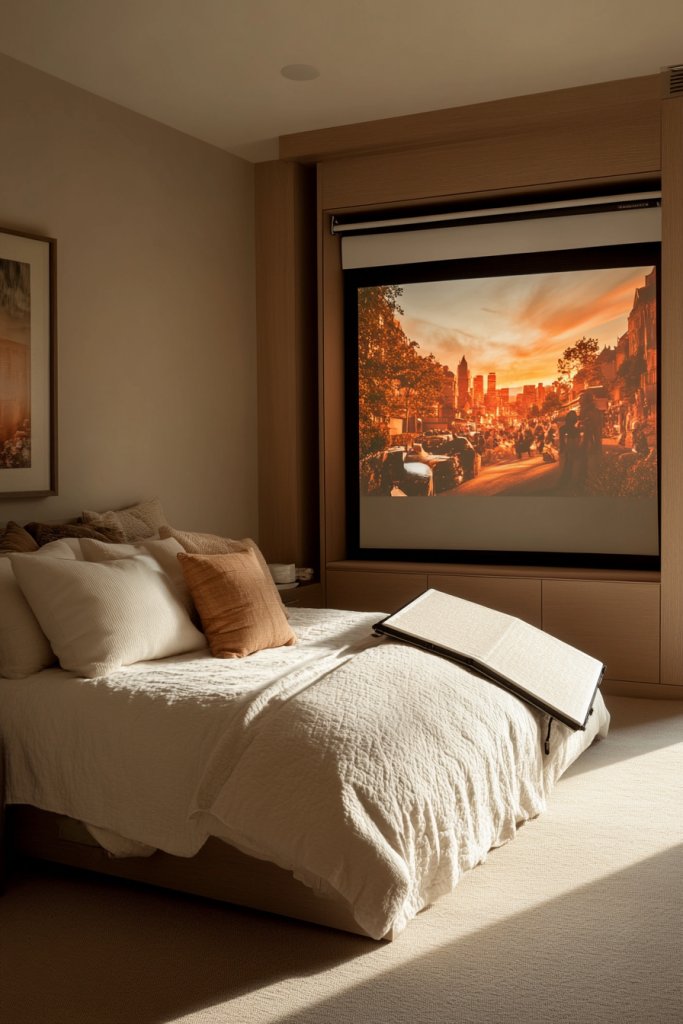
7. Hang a Fold-Down Projector Screen Hidden in a Stylish Ceiling Panel
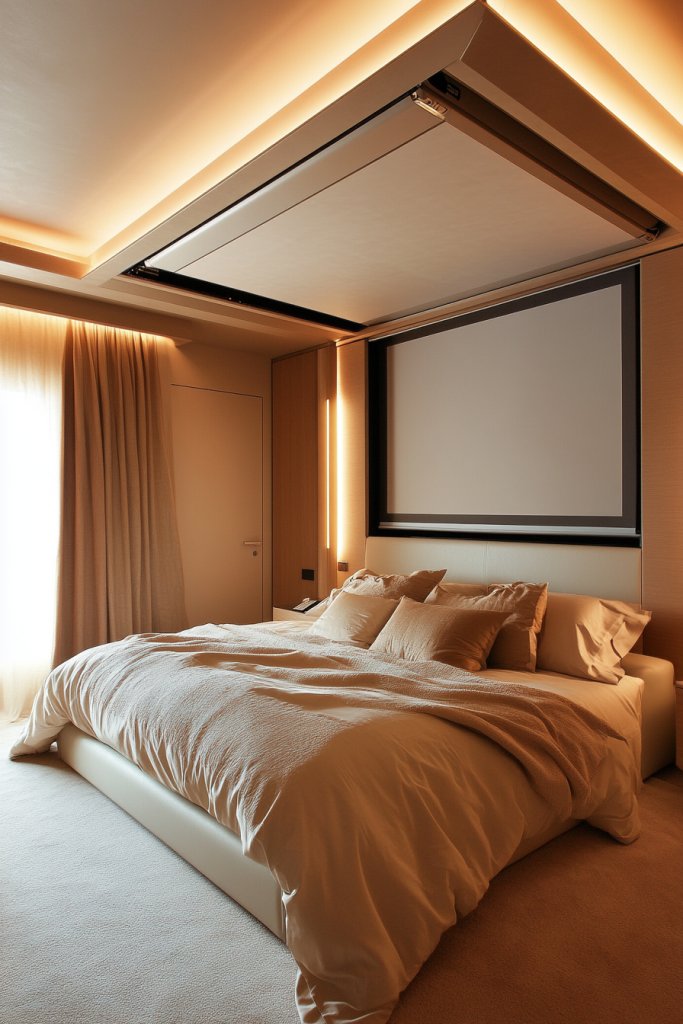
Tired of bulky screens cluttering your space? A fold-down projector screen hidden within a stylish ceiling panel offers a sleek, space-saving solution. It’s perfect for those who love a clean look but want easy access to a cinematic display when needed. If your room feels cluttered or you dislike visible tech, this idea is a game-changer.
Imagine a decorative ceiling panel that seamlessly blends into your decor, with a hidden fold-down screen that appears only when you need it. When lowered, it provides a crisp, flat surface for projection that rivals commercial cinemas. When not in use, it retracts smoothly into the ceiling, maintaining a minimalist aesthetic. The result is a clutter-free, elegant space that transforms into a home theater at the push of a button.
Choose ceiling panels with decorative finishes—wood veneer, textured plaster, or painted surfaces—that match your decor. For a more luxurious look, install a motorized system with remote control. Incorporate acoustic panels or soft fabric around the panel for sound absorption and aesthetic appeal. Adjust the panel size to fit your room’s proportions and ceiling height.
Begin by assessing your ceiling structure and choosing a suitable retractable screen mechanism. Work with professionals if needed to ensure seamless installation. Integrate wiring for your projector within the ceiling for a clean look, and install a remote control system for easy operation. Test the mechanism thoroughly, adjusting the tension and alignment. Use blackout curtains or shades to improve projection quality.
Frame the ceiling panel with decorative molding or lighting to enhance the visual appeal. Add motorized shades or blackout curtains around the panel to control ambient light. Incorporate your favorite colors or textures into the ceiling design for a personalized touch. Keep remote controls or switches accessible for quick setup.
This hidden-screen approach marries practicality with style, turning your room into a sophisticated entertainment space. It’s a clever way to keep your decor sleek while enjoying big-screen movies. Once installed, you’ll love how effortlessly your space transforms from bedroom to home theater. Ready to hide your screen in plain sight?
8. Use a Portable Projector for Spontaneous Movie Nights
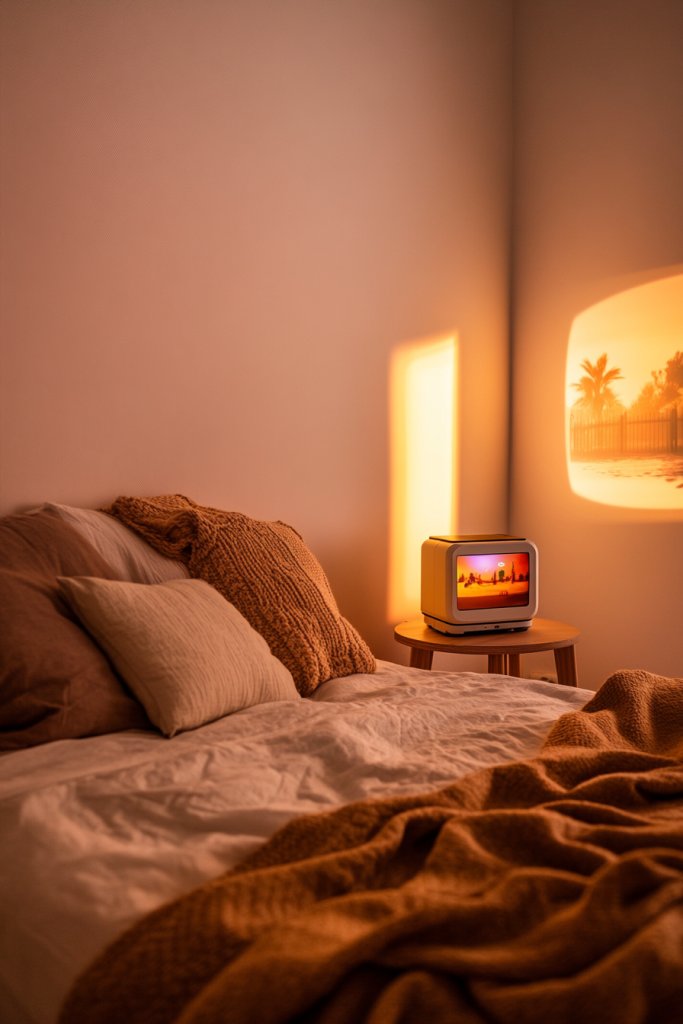
Ever wish you could have movie nights anywhere, anytime? A portable projector makes spontaneous viewing a breeze. It’s perfect for impromptu gatherings or transforming any space into a mini theater. If you dislike being tied down by fixed setups, this idea offers ultimate freedom.
Picture a compact, lightweight device that easily fits into your bag or backpack. You can set it up on your nightstand, a desk, or even outside on a clear night. The projector streams content wirelessly from your smartphone or laptop, projecting vividly onto any blank wall or sheet. It’s like carrying a personal cinema in your pocket, ready for adventures.
Choose a projector with a sleek, modern design that complements your style. For outdoor use, add a sturdy tripod or portable stand for stability. Customize your viewing surface with a foldable or roll-up screen, or simply project onto a blank wall or sheet. Use weatherproof options for outdoor setups, and pair with portable speakers for immersive sound.
Select a compact projector with good battery life and wireless connectivity. Charge it fully before each use and keep spare batteries or power banks nearby. Connect your device via Wi-Fi or Bluetooth, and choose a suitable surface—white sheet, wall, or portable screen. Adjust focus and keystone correction for sharp images. Test different environments to find the best setup for each location.
Create a carry case or sleeve to protect your projector during transport. Personalize your viewing experience with custom playlists or streaming apps. Use portable speakers with better sound quality to enhance audio. Incorporate ambient lighting or reflective surfaces to improve image brightness outdoors.
This device empowers you to enjoy movies anywhere, turning any location into your personal cinema. It’s ideal for travel, parties, or relaxing in your backyard. With minimal fuss, you can enjoy spontaneous movie nights that feel special every time. Ready to take your entertainment on the go?
9. Incorporate a Wall-Mounted Shelving Unit for Media Devices and Decor
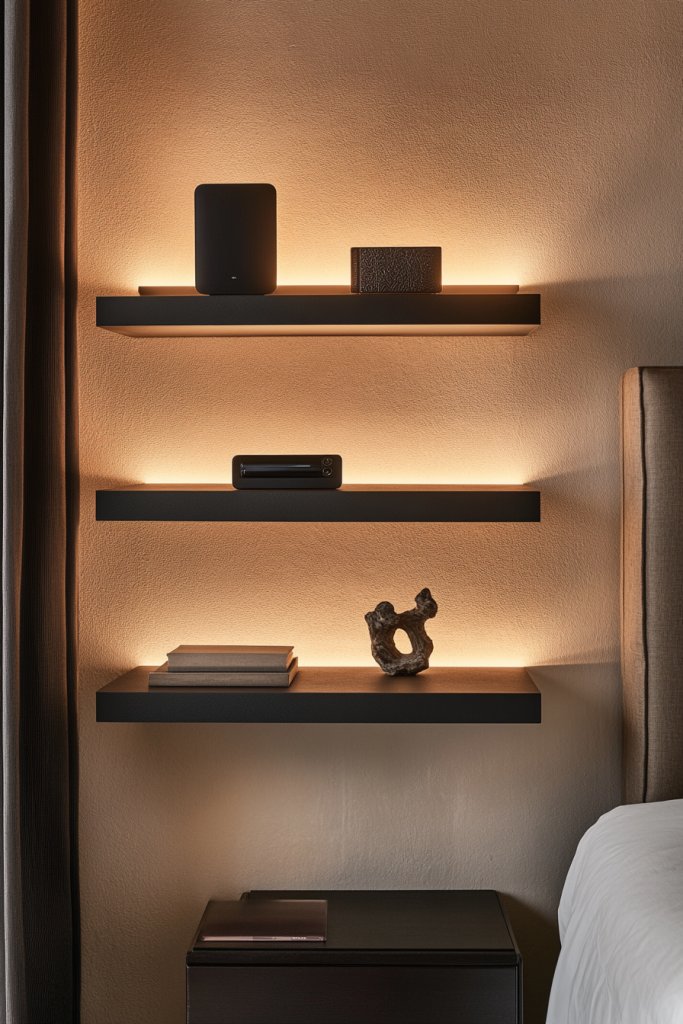
Cluttered surfaces and tangled cords ruin the sleek look of your bedroom entertainment setup. Wall-mounted shelving offers a neat, organized way to house your media devices, projectors, and decorative elements. It creates a clean, modern aesthetic without sacrificing functionality. If you’re tired of chaotic wires and clutter, this idea can tidy things up.
Imagine a streamlined, floating shelf system running along your wall, neatly holding your streaming box, media players, and projector equipment. Minimalist brackets or hidden mounting hardware make it look like the shelf is floating in mid-air. You can add decorative accents like textured boxes or sculptural objects to personalize the space. The entire setup feels cohesive and clutter-free.
Choose open shelving for easy access or closed cabinets for a tidier look. Match materials—wood, metal, or acrylic—to your decor style. Incorporate adjustable shelves to accommodate different device sizes or seasonal decor updates. Use cable management channels behind or within the shelves to hide cords and keep everything clean.
Start with measuring your wall space and selecting a shelving system that fits your needs. Mount brackets securely into wall studs for stability, especially if holding heavy devices. Organize cords with clips and sleeves to prevent tangling. Place your media devices on the shelves, connecting them to your projector and TV. Test the setup by streaming content and adjusting device placements as needed.
Add decorative elements like LED accent lighting underneath shelves or inside closed cabinets for a sophisticated glow. Incorporate textured or patterned backing panels for visual interest. Change devices or decor seasonally to keep the space lively. Keep remote controls and accessories organized in small containers or drawers integrated into the shelving.
A well-organized media wall elevates your entire room’s look and functionality. It simplifies daily entertainment routines and impresses guests with its clean design. With a bit of planning, your bedroom can become a clutter-free, tech-savvy sanctuary. Ready to streamline your media setup?
10. Project Scenic Nature Videos onto the Ceiling for Relaxation
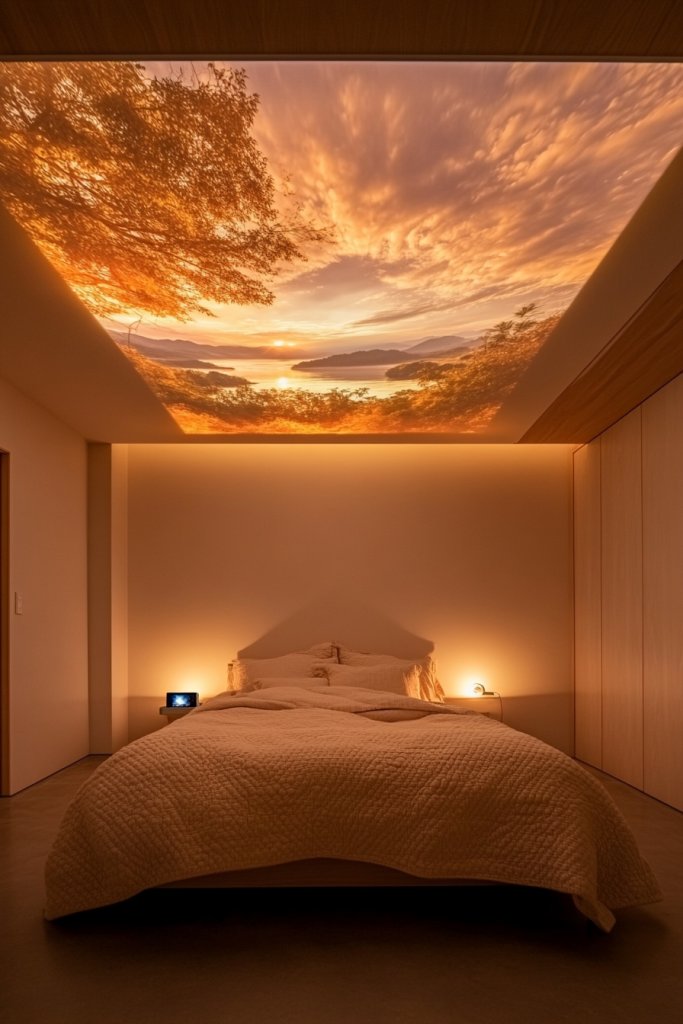
Struggling to unwind after a hectic day? Projecting calming nature scenes onto your ceiling creates a peaceful environment that helps you relax and de-stress. It’s a simple way to turn your bedroom into a tranquil retreat. If your current routine feels dull or stressful, this idea offers a soothing escape.
Picture tranquil forests, gentle ocean waves, or blooming cherry blossoms softly illuminated above you. The visuals create a sense of depth and serenity, especially when paired with ambient sounds or scent diffusers. The projection adds a visual anchor that makes winding down more immersive and calming. It’s like lying under a canopy of peaceful scenery.
Choose videos with high-resolution, soothing color palettes, and loop them for continuous relaxation. For a more immersive feel, add textured ceiling panels or fabric drapes that complement the visuals. Seasonal themes—autumn leaves, winter snow—can be swapped easily. Use blackout curtains or shades to optimize image clarity, especially during daytime.
Select a projector with a wide throw ratio and high contrast for vivid images. Mount it on the ceiling or a sturdy shelf aimed at the ceiling surface. Use a media device or streaming service to access nature videos or calming scenes. Adjust focus, keystone, and brightness for optimal clarity. Incorporate a speaker for ambient sounds, or sync with a sound machine for full sensory immersion.
Add soft, textured ceiling treatments like fabric or foam tiles that absorb sound and enhance visuals. Incorporate scent diffusers with calming aromas—lavender, chamomile—to deepen relaxation. Change scenes seasonally or based on your mood. Keep a small remote or app handy for quick adjustments.
Transform your bedroom into a restorative sanctuary that combines visual calm with sensory comfort. It’s an effortless way to improve sleep quality and mental wellbeing. Once set up, you’ll look forward to winding down under your own personal nature canopy. Ready to relax in style?
11. Use a Geometric or Bold Frame to Mimic a Classic Cinema Screen
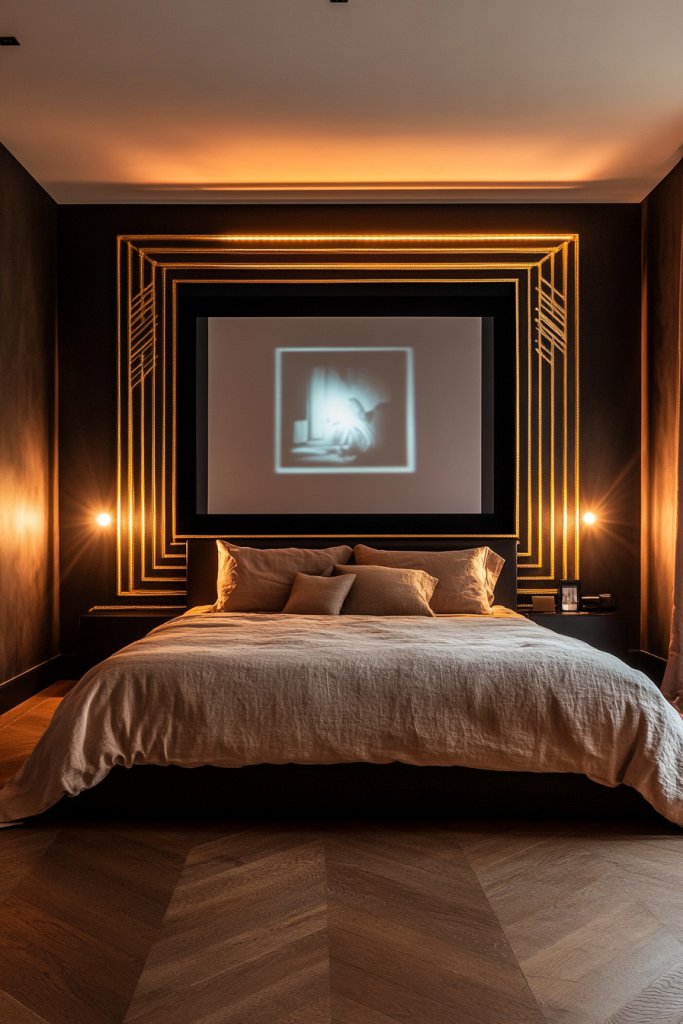
Feeling like your projector image looks a bit plain or out of place? Adding a geometric or bold frame around your projected screen can give your setup a polished, cinematic look. It transforms a simple projection into a true art piece that matches your decor. If you want your home theater to feel more authentic, this is a stylish upgrade.
Imagine a sleek, geometric frame—perhaps a rectangle or octagon—that surrounds your projection, creating a defined, ‘screen-like’ appearance. The frame can be painted or made from decorative molding, adding depth and contrast. When your projector turns on, the image pops against the frame, mimicking the classic cinema look. It adds a layer of sophistication and focus to your entertainment area.
Choose frames in materials that match your decor—matte black, metallic, or wood finishes for a modern, vintage, or rustic feel. For seasonal updates, swap out the frame’s color or design. Incorporate LED backlighting behind the frame to create a subtle glow that highlights the projection. Adjust the size of the frame for different room proportions.
Measure your projection area carefully to build or buy a frame that fits perfectly. Use molding or decorative trim to create a custom border, attaching it securely around your projection surface. Paint or finish the frame to match your room’s style. Install LED strips or indirect lighting behind the frame for a luminous effect. Test projection alignment to ensure the image is centered within the frame.
Decorate the frame with thematic accents—like film reels, vintage posters, or textured panels—without overwhelming the visual focus. Use lighting effects to enhance the cinematic feel, or add a small shelf within the frame for decor or media accessories. Change the frame’s color or design seasonally for variety. Keep the design minimal to avoid distraction from the content.
This framing trick elevates your projector setup into a true home cinema. It adds a professional touch and enhances focus, making every movie feel special. With a little craft or purchase, you can craft a stylish focal point that impresses everyone. Ready to frame your cinematic experience?
12. Build a Custom Headboard with Integrated Projector Space
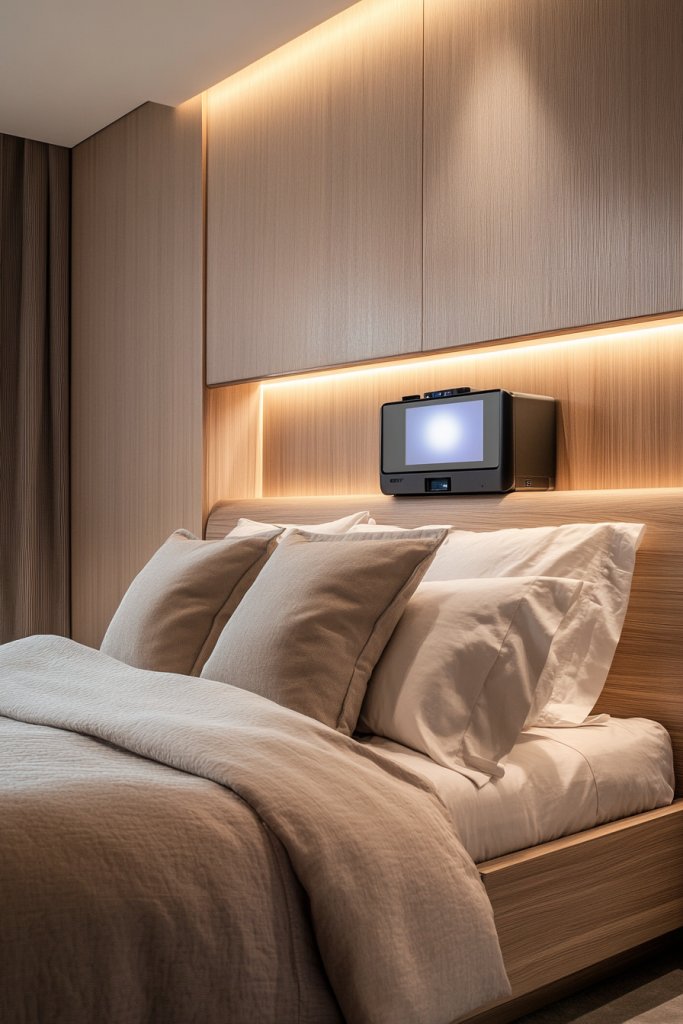
Looking to combine style and function in your bedroom? A custom headboard with an integrated projector space offers a sleek solution that keeps everything in one place. It turns your bed into a multimedia hub, blending comfort with tech sophistication. If your current setup feels disjointed or cluttered, this could be the upgrade you need.
Imagine a plush, upholstered headboard with a recessed section designed to hold a small projector or screen. The fabric or paneling can be customized to match your decor—think tufted velvet or textured linen. When the projector is in use, it’s seamlessly integrated into your sleeping area, creating a clean and modern look. When not in use, it remains hidden behind a decorative panel.
Choose fabrics and finishes that complement your bedroom style—sleek leather, cozy fabric, or even textured wood panels. For a high-tech look, incorporate hidden wiring channels and remote-controlled covers. Adjust the size of the recessed area based on your projector’s dimensions. Seasonal accents like decorative pillows or throws can add personality.
Start with a custom-built headboard or modify an existing one. Create a recessed compartment with a durable, heat-resistant surface for your projector. Install a small shelf or mounting bracket inside the space, ensuring easy access and ventilation. Use concealed wiring to connect your projector to power and media sources. Test the setup by projecting onto a wall or screen at the desired height.
Add a textured or patterned fabric to the headboard for visual interest. Incorporate smart lighting around the headboard edge to enhance the ambiance. Personalize with decorative accents or themed textiles that match your favorite movies or series. Keep remote controls or media devices within easy reach on bedside tables.
A custom headboard with integrated projector space elevates your bedroom’s style while boosting functionality. It creates a cohesive, modern space that’s both comfortable and tech-savvy. With a little craftsmanship or professional help, you can enjoy a sleek, multifunctional retreat. Ready to sleep and watch in perfect harmony?
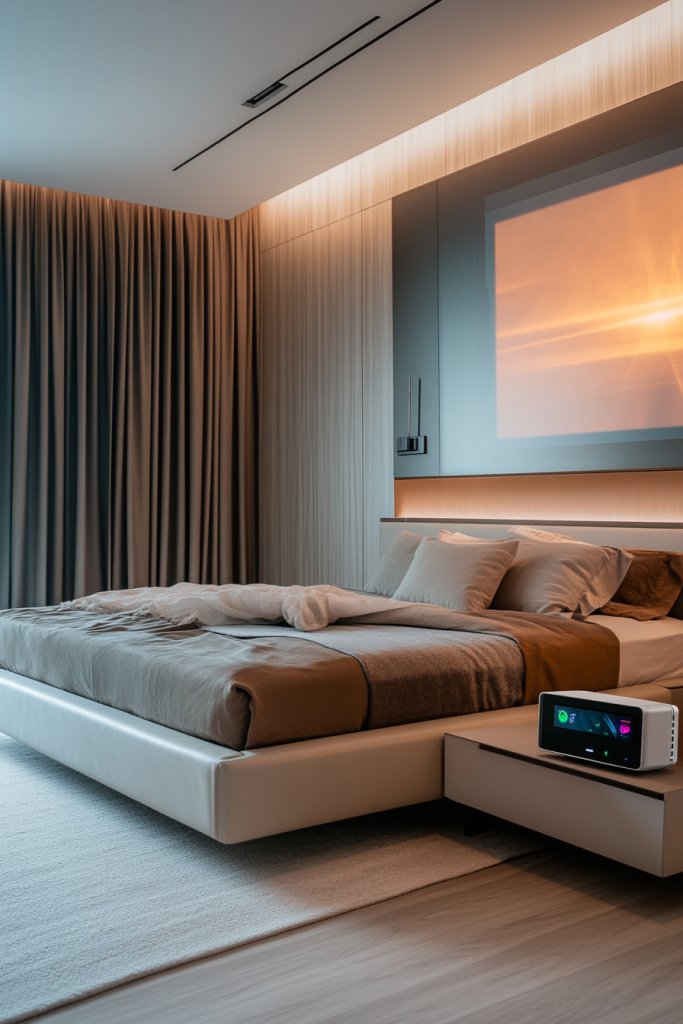
13. Use a Projector with Auto-Focus and Keystone Correction for Easy Setup
Ever struggled with blurry images or awkward angles when setting up your projector? A model with auto-focus and keystone correction simplifies the process, ensuring sharp images with minimal effort. It’s perfect for those who want quick, fuss-free cinematic experiences. If your current projector demands constant adjustments, this upgrade could save you time and frustration.
Picture a projector that automatically detects the optimal focus and adjusts keystone distortion to produce a crisp, centered image every time. The setup feels effortless—just turn it on, and it calibrates itself. Whether projecting onto a wall, screen, or textured surface, the result is a clean, professional-looking image without fiddling with manual settings. It’s like having a smart assistant for your home theater.
Choose models that combine auto-focus, keystone correction, and wireless connectivity for maximum convenience. For different room sizes and surfaces, ensure your projector supports multiple aspect ratios and image adjustments. Keep the device portable or ceiling-mounted, depending on your aesthetic. Pair it with sleek mounts or stands that match your decor.
Select a projector with the latest auto-focus and keystone features; many are plug-and-play. Position it at an appropriate distance from your projection surface—short-throw models work well for small rooms. Connect your media source wirelessly or via HDMI. Power on the projector; it automatically adjusts focus and image alignment. Fine-tune only if needed, then enjoy.
Use a remote app for quick adjustments and preset modes for different content types. Keep a protective case or stand to move the projector easily. For added convenience, install ceiling mounts with motorized adjustments so you can change angles remotely. Keep spare bulbs and filters for maintenance.
This tech makes your cinematic setup almost foolproof, enabling effortless movie nights. It boosts your confidence in DIY home theater projects and impresses guests with its ease of use. Once set, you’ll love how naturally your entertainment system operates. Ready for a smarter projection experience?
14. Incorporate a Foldable Screen for Multi-Function Use
Limited space and a desire for versatility? A foldable projection screen offers a flexible solution that can be stored away when not in use. It’s perfect for small bedrooms or multi-purpose rooms where space needs to be maximized. If you want a quick way to switch between a bedroom and a home theater, this idea is ideal.
Visualize a lightweight, portable screen that folds neatly into a compact case or wall-mounted bracket. When needed, unfold it smoothly to create a clean, flat surface for projection. When finished, fold or roll it up, and it disappears into a small storage space or cabinet. The setup is quick, and the screen’s size can vary from small to large, adapting to your room.
Choose screens made from durable, matte fabrics or aluminum frames that resist creasing. For aesthetic consistency, select neutral or matching colors to your decor. Use tensioning systems or magnetic edges to ensure a flat surface. Adjust the size of the screen to suit your space and projection distance.
Start by selecting a foldable screen that fits your room size and projector. Mount a wall bracket or store the folded screen in a closet or cabinet. When using, unroll or unfold the screen, securing it properly. Connect your projector and test the image alignment. Store the screen in a dedicated place for easy access when needed. Keep it clean and wrinkle-free for best results.
Personalize the screen with custom borders, frames, or decorative fabrics that match your room style. Use protective covers or cases for longevity. Incorporate a dedicated storage spot for the folded screen to keep your space tidy. Change the fabric or border seasonally for variety.
This flexible setup allows you to enjoy cinematic experiences without sacrificing space or style. It’s a smart, adaptable solution that makes your room multifunctional and sleek. Once you master the foldaway system, movies become an effortless treat. Ready to fold your way into better entertainment?
15. Use a Ceiling Mount with a Remote-Controlled Projector for Convenience
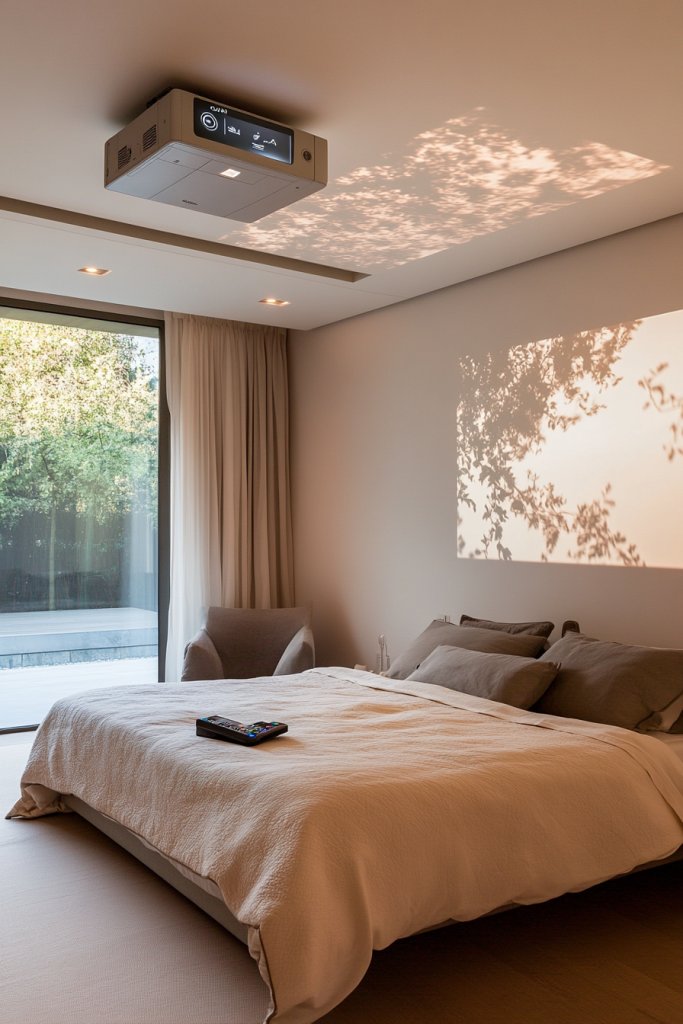
Tired of manually adjusting your projector every time you want to watch? A ceiling mount paired with a remote-controlled projector offers effortless operation and a sleek look. It removes clutter and makes movie nights as simple as pressing a button. If convenience is your priority, this upgrade is a no-brainer.
Picture a discreet ceiling mount holding your projector, which responds to remote commands. You can tilt, swivel, or turn the projector on and off without getting out of your chair. The setup looks clean and modern, with all wiring hidden and integrated seamlessly into your ceiling. It’s like having a personal assistant for your entertainment system.
Select mounts that match your ceiling finish—white, metallic, or black—to blend seamlessly. For a more minimalist look, choose motorized mounts with auto-positioning features. Adjust the projector’s angle and focus remotely, making setup quick and easy. For larger rooms, consider dual mounts for different viewing angles.
Securely install the ceiling mount into ceiling joists or with appropriate anchors. Attach your projector, ensuring it’s balanced and stable. Connect all cables through concealed channels or in-wall wiring solutions. Sync your remote or home automation system for easy control. Test the projector’s movement and image alignment, making fine adjustments as needed.
Pair your remote-controlled projector with voice assistants or smart home apps for hands-free operation. Incorporate a smart lighting system that dims automatically when the projector turns on. Keep spare remotes or batteries nearby for convenience. Customize your projector’s startup and shutdown sequences for a fully integrated experience.
This setup combines convenience with sleek design, making your movie nights effortless and stylish. It boosts your confidence in DIY tech upgrades and impresses guests with a high-end look. Once installed, you’ll wonder how you ever watched movies without remote control. Ready for a smarter, more convenient setup?
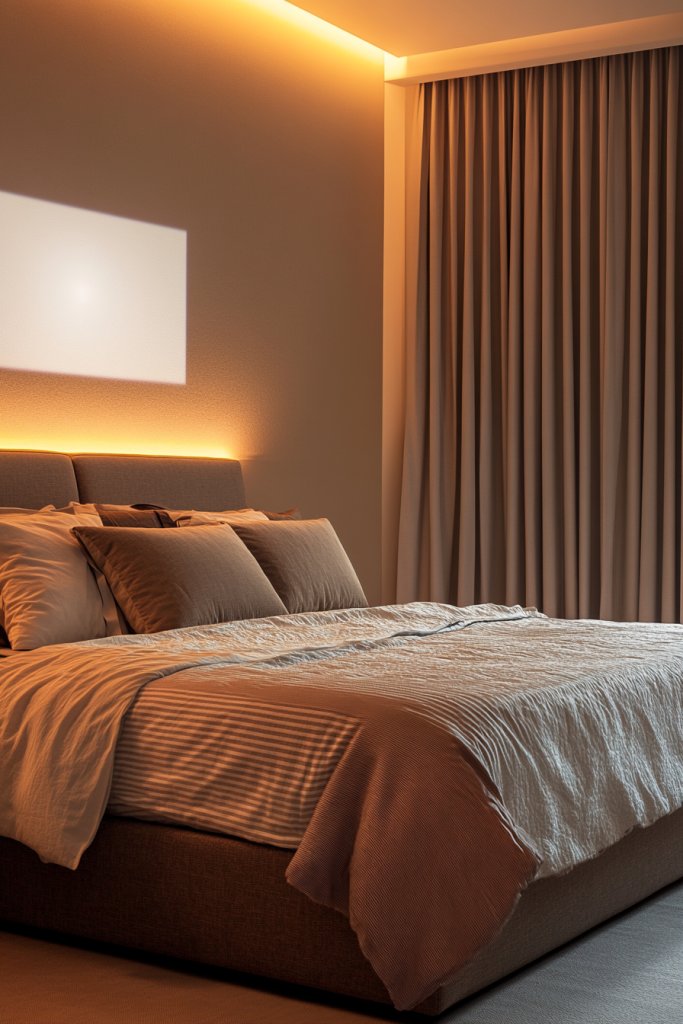
16. Decorate the Room with Subtle, Sound-Absorbing Textures
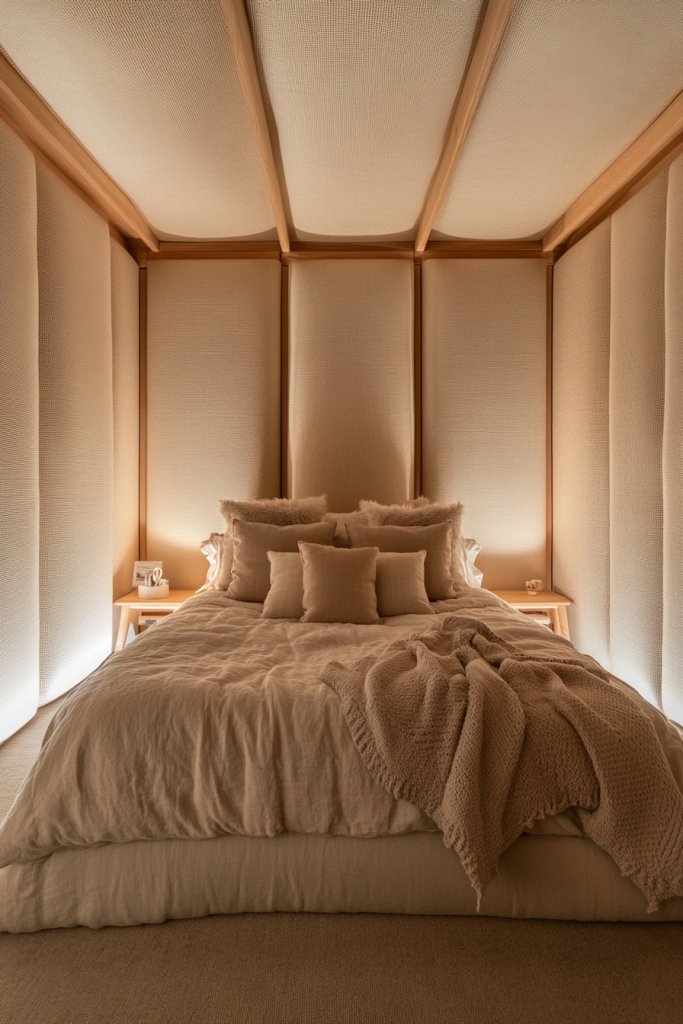
Poor acoustics can ruin the cinematic experience, making sound muddy and distracting. Incorporating sound-absorbing textures subtly into your room design improves audio clarity and creates a cozy atmosphere. It’s about enhancing both sight and sound for a true home theater vibe. If your current setup feels echoey or harsh, this idea can make a real difference.
Imagine soft, textured wall panels, fabric-covered acoustic tiles, or plush textiles that absorb sound and add visual warmth. These elements don’t have to be flashy; they blend seamlessly into your decor—think upholstered headboards, textured rugs, or fabric wall hangings. The combination minimizes echo and improves sound quality, making speech and music clearer.
Choose textiles in muted, neutral tones for a subtle effect or bold textures for a statement look. Use soft wall panels or padded headboards to add depth without clutter. Incorporate plush rugs or throws to further dampen sound reflections. Seasonal fabric updates can refresh your space and mood.
Start by assessing your room’s acoustics and identifying echo-prone areas. Install fabric-covered panels or padded wall sections in key locations—behind the projector or around seating. Use thick rugs or carpets on the floor to absorb sound. Strategically place soft furnishings to fill gaps and diffuse sound waves. Test with music or dialogue to evaluate improvements and refine placement.
Add decorative elements like textured wall coverings or sculptural fabric art that doubles as sound absorbers. Incorporate matching textiles—curtains, cushions, throws—that reflect your style. Use removable or washable covers for easy maintenance and seasonal updates. Keep a balance between aesthetic appeal and acoustic function.
By improving sound quality subtly, you create a richer, more immersive cinematic experience. It’s a simple upgrade that elevates your entire entertainment space. With softer acoustics, every dialogue and soundtrack becomes crystal clear. Ready to enjoy movies in peace?
17. Integrate Smart Home Technology for Automated Movie Setups
Tired of manually turning on devices and adjusting settings before movie night? Integrating your projector with smart home technology automates the entire setup. It’s about convenience, efficiency, and creating a seamless entertainment experience. If you love tech and automation, this feature will blow your mind.
Imagine walking into your room and saying, “Movie time,” to your voice assistant. Lights dim, blinds close, the projector powers on, and your sound system calibrates—all automatically. You can customize scenes for different moods or occasions, making your space feel like a personal cinema. It’s effortless luxury at your fingertips.
Choose compatible smart devices—voice assistants, smart switches, and hub systems—that integrate easily with your projector and lighting. Use apps to create routines or scenes, such as “Movie Night,” that trigger multiple actions simultaneously. Incorporate smart blinds or curtains for light control. Keep your tech updated for compatibility and security.
Connect your projector and other entertainment devices to a smart home hub or system. Program routines via apps or voice commands to turn on, adjust focus, and set the correct input source. Automate lighting, curtains, and audio to activate in sync. Test each step to ensure smooth operation, and troubleshoot any connectivity issues. Keep a backup remote for manual control.
Create custom scenes—“Romantic Movie Night,” “Family Movie Marathon”—with personalized lighting and audio settings. Use motion sensors or door sensors to trigger setups automatically when you enter the room. Keep your voice commands simple and consistent for ease of use. Regularly update your systems for new features and security.
Automation elevates your entertainment to a new level of sophistication and ease. It impresses friends and family and makes your daily routines more enjoyable. With just a few integrations, your bedroom becomes a smart, cinematic sanctuary. Ready to automate your movie nights?
Conclusion
From sleek wall-mounted setups to cozy outdoor cinema corners, this collection of projector ideas offers endless inspiration for transforming your bedroom into a cinematic haven. Each concept caters to different tastes and spaces, making it easy to find the perfect fit for your lifestyle. Don’t hesitate—try these ideas and make your bedroom the ultimate spot for unforgettable movie nights. Your perfect cinematic retreat is just a projector away!
Leave a Reply